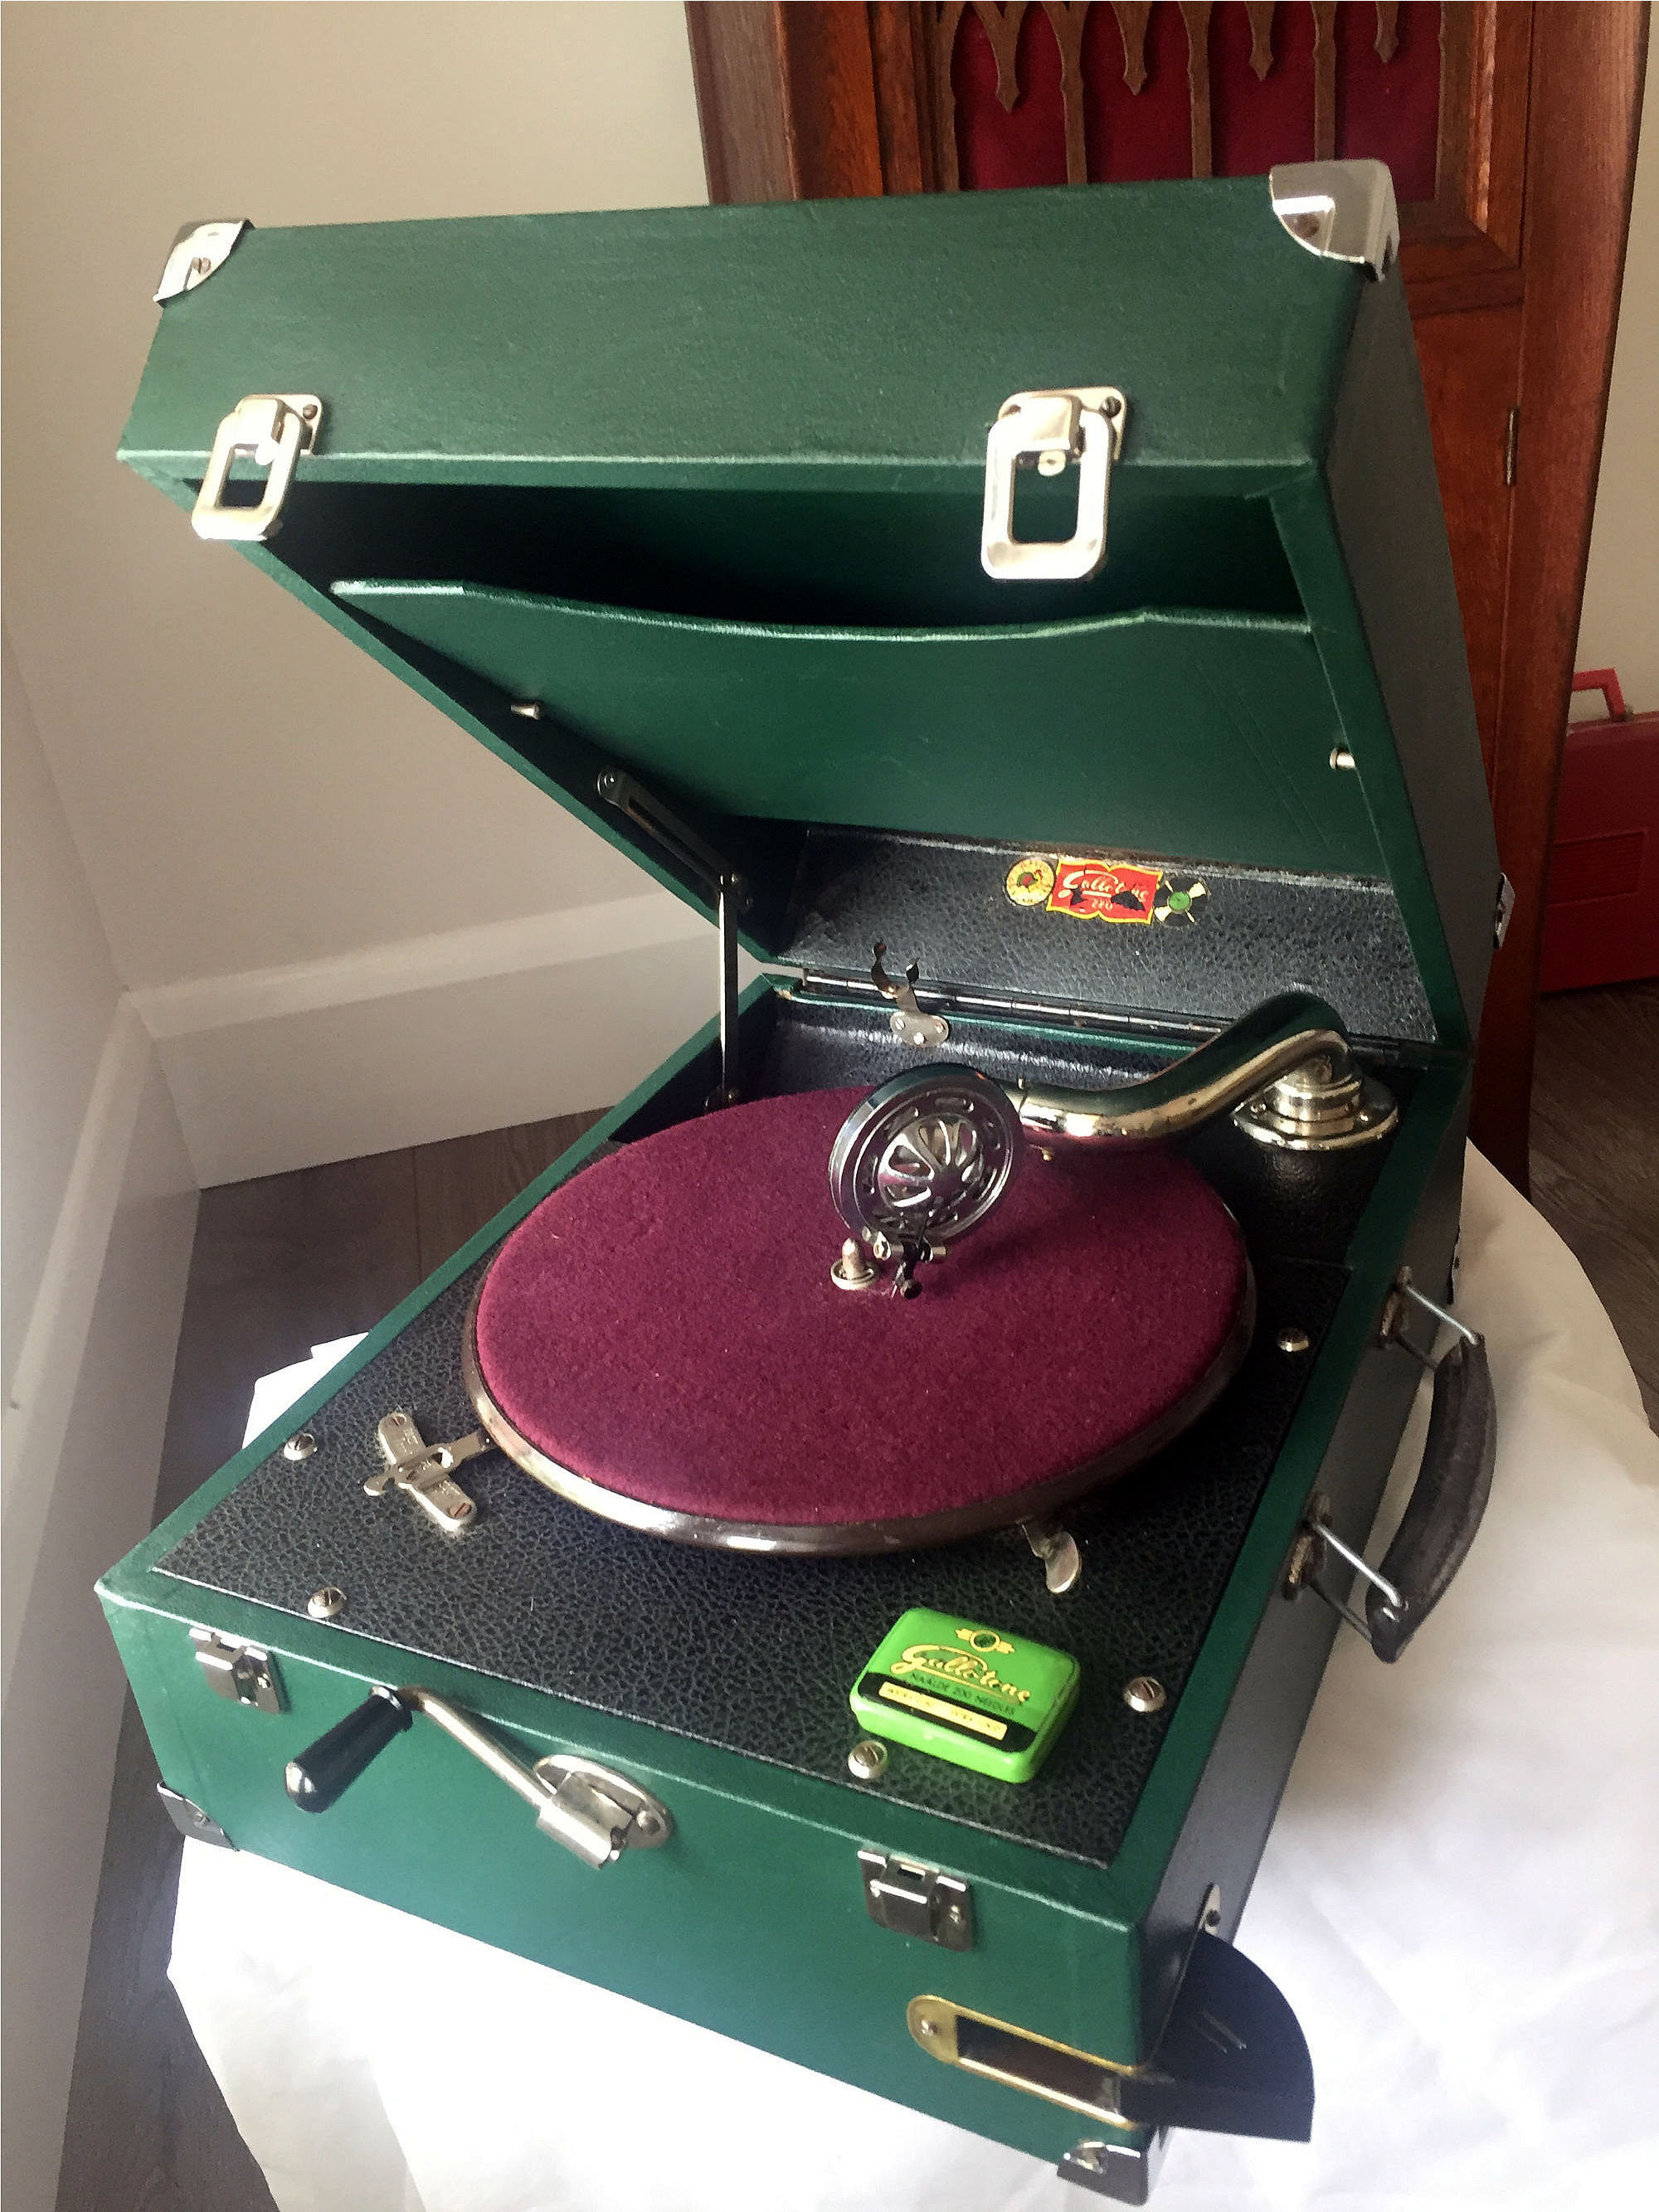
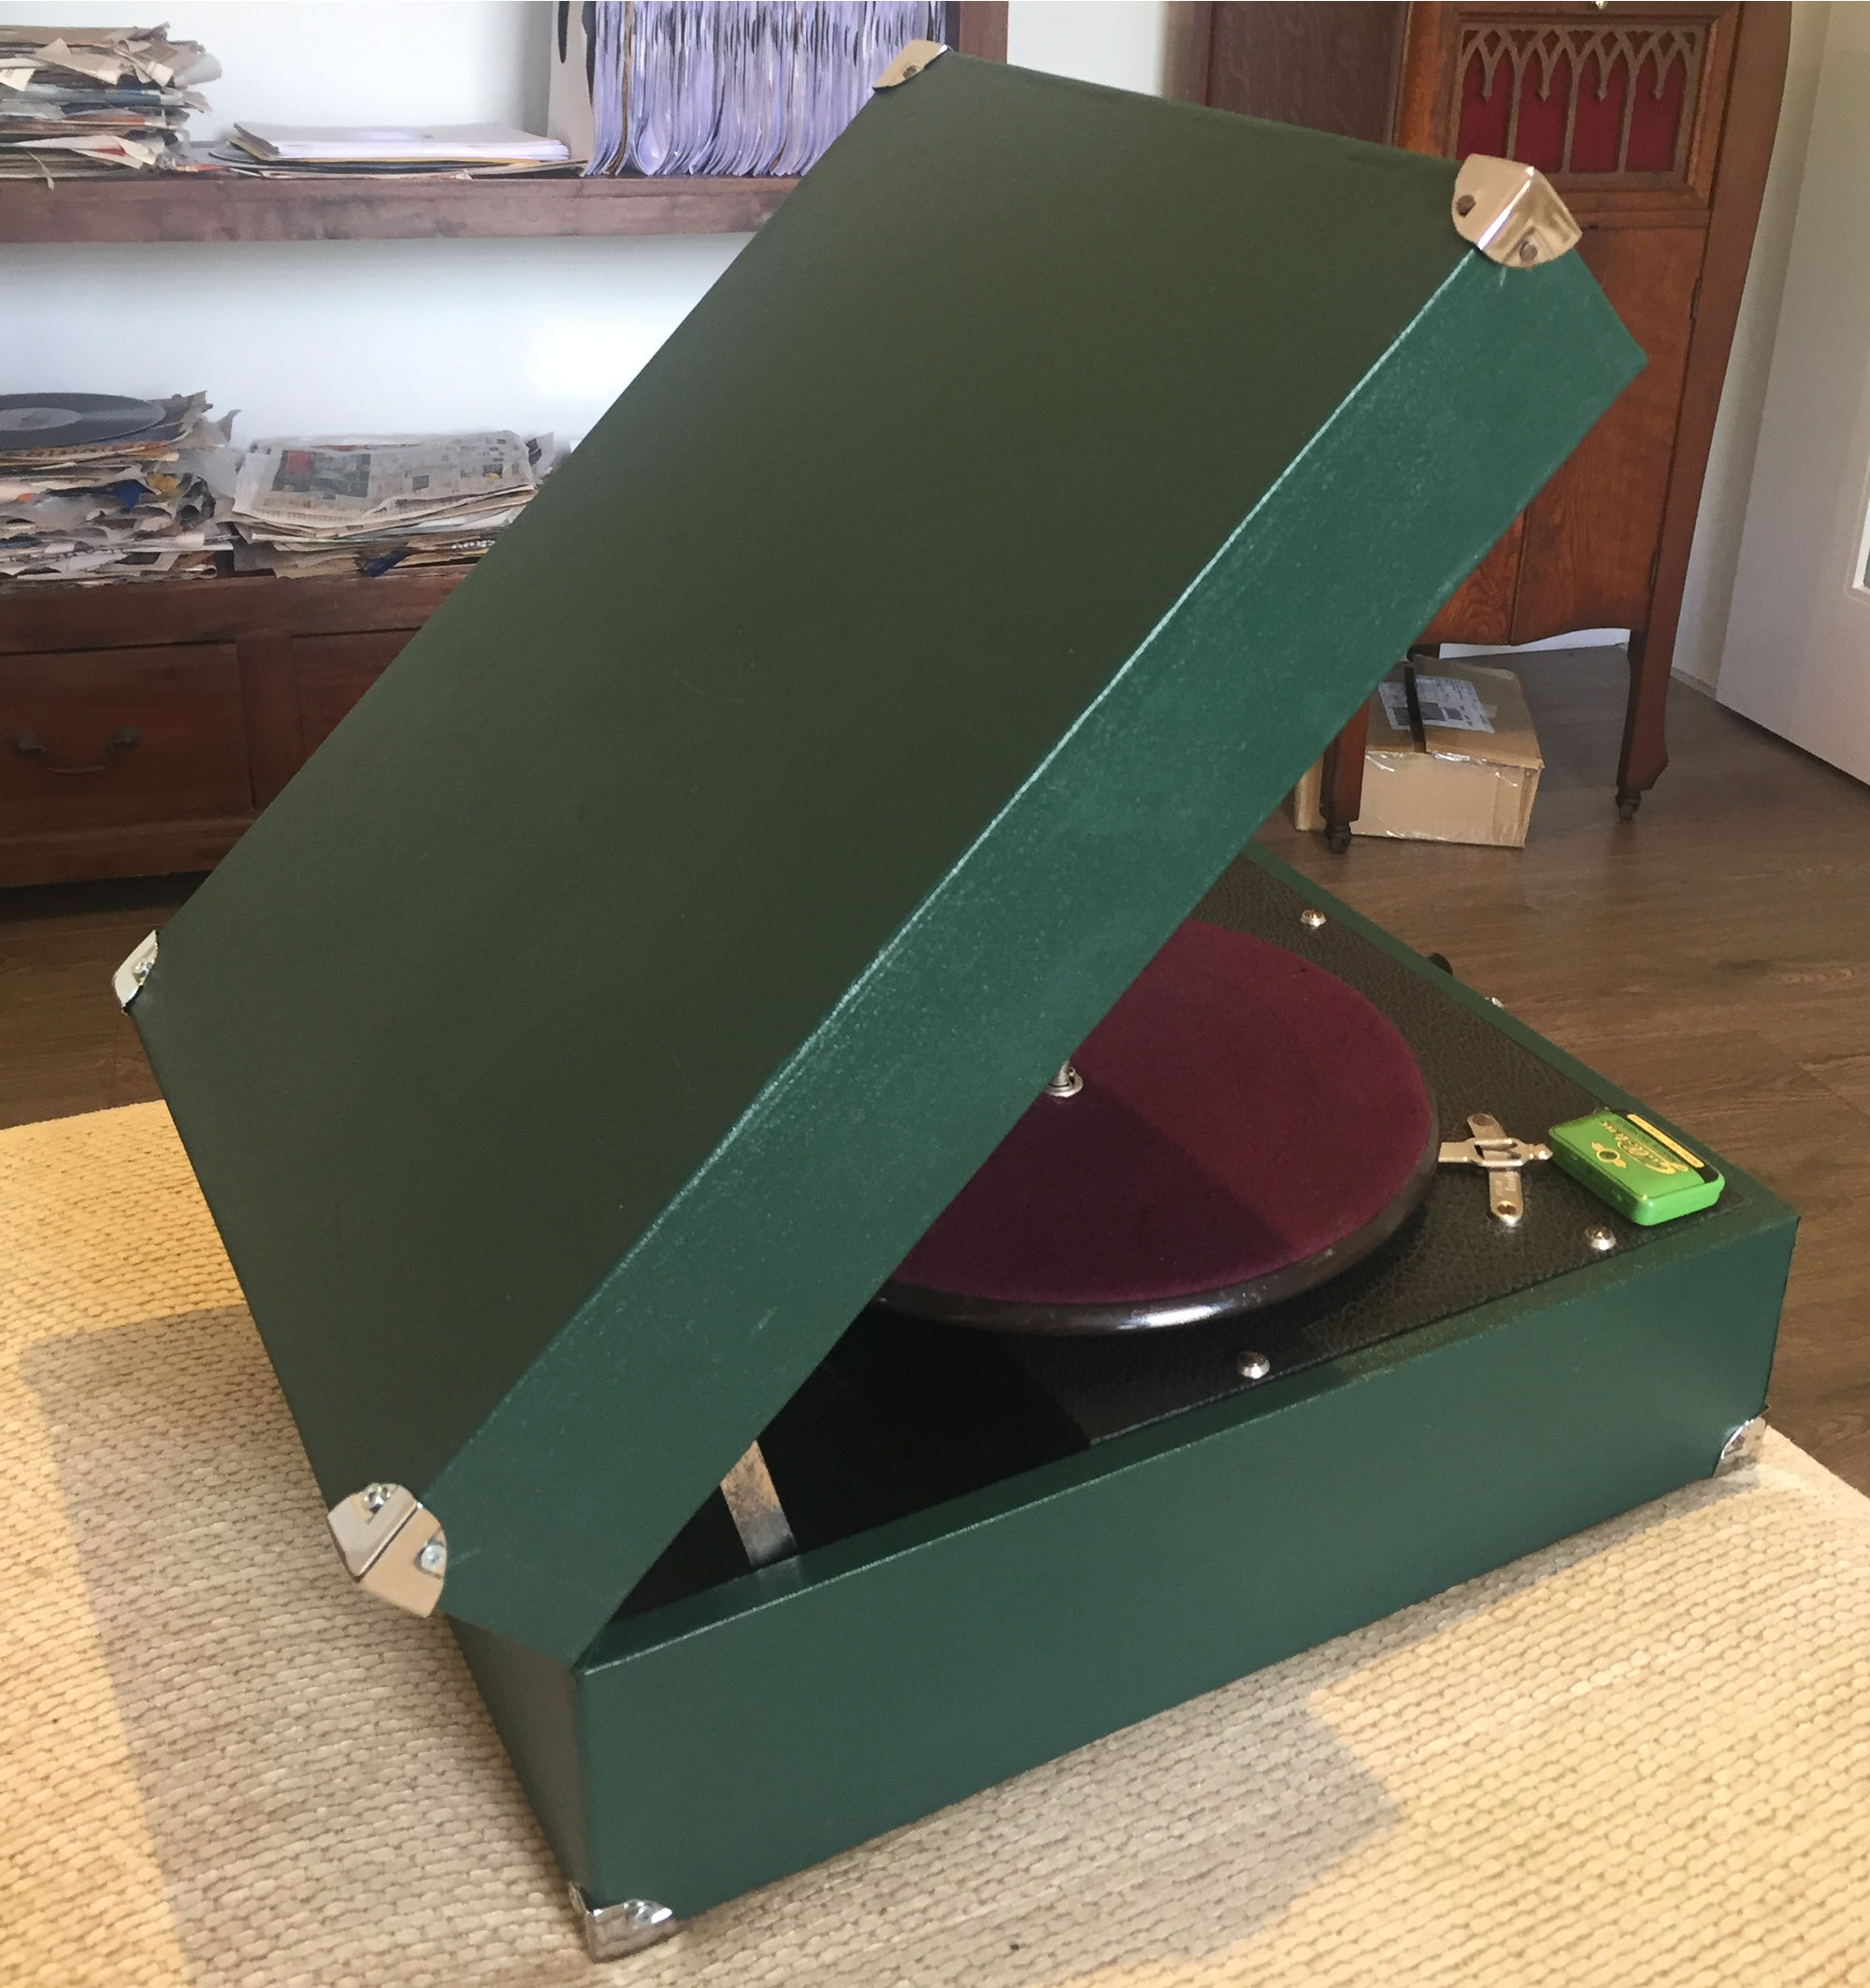
Before and after shots
This is what I did and how I did it. I could find almost no help online about how to go about this, so I've posted this article to assist anyone else who tries. Please be warned, I am a rank beginner- this is my first attempt. So feel free to contact the blog owner with tips or tricks I missed.
The unit is a South African Gallotone- (see more details at the end).
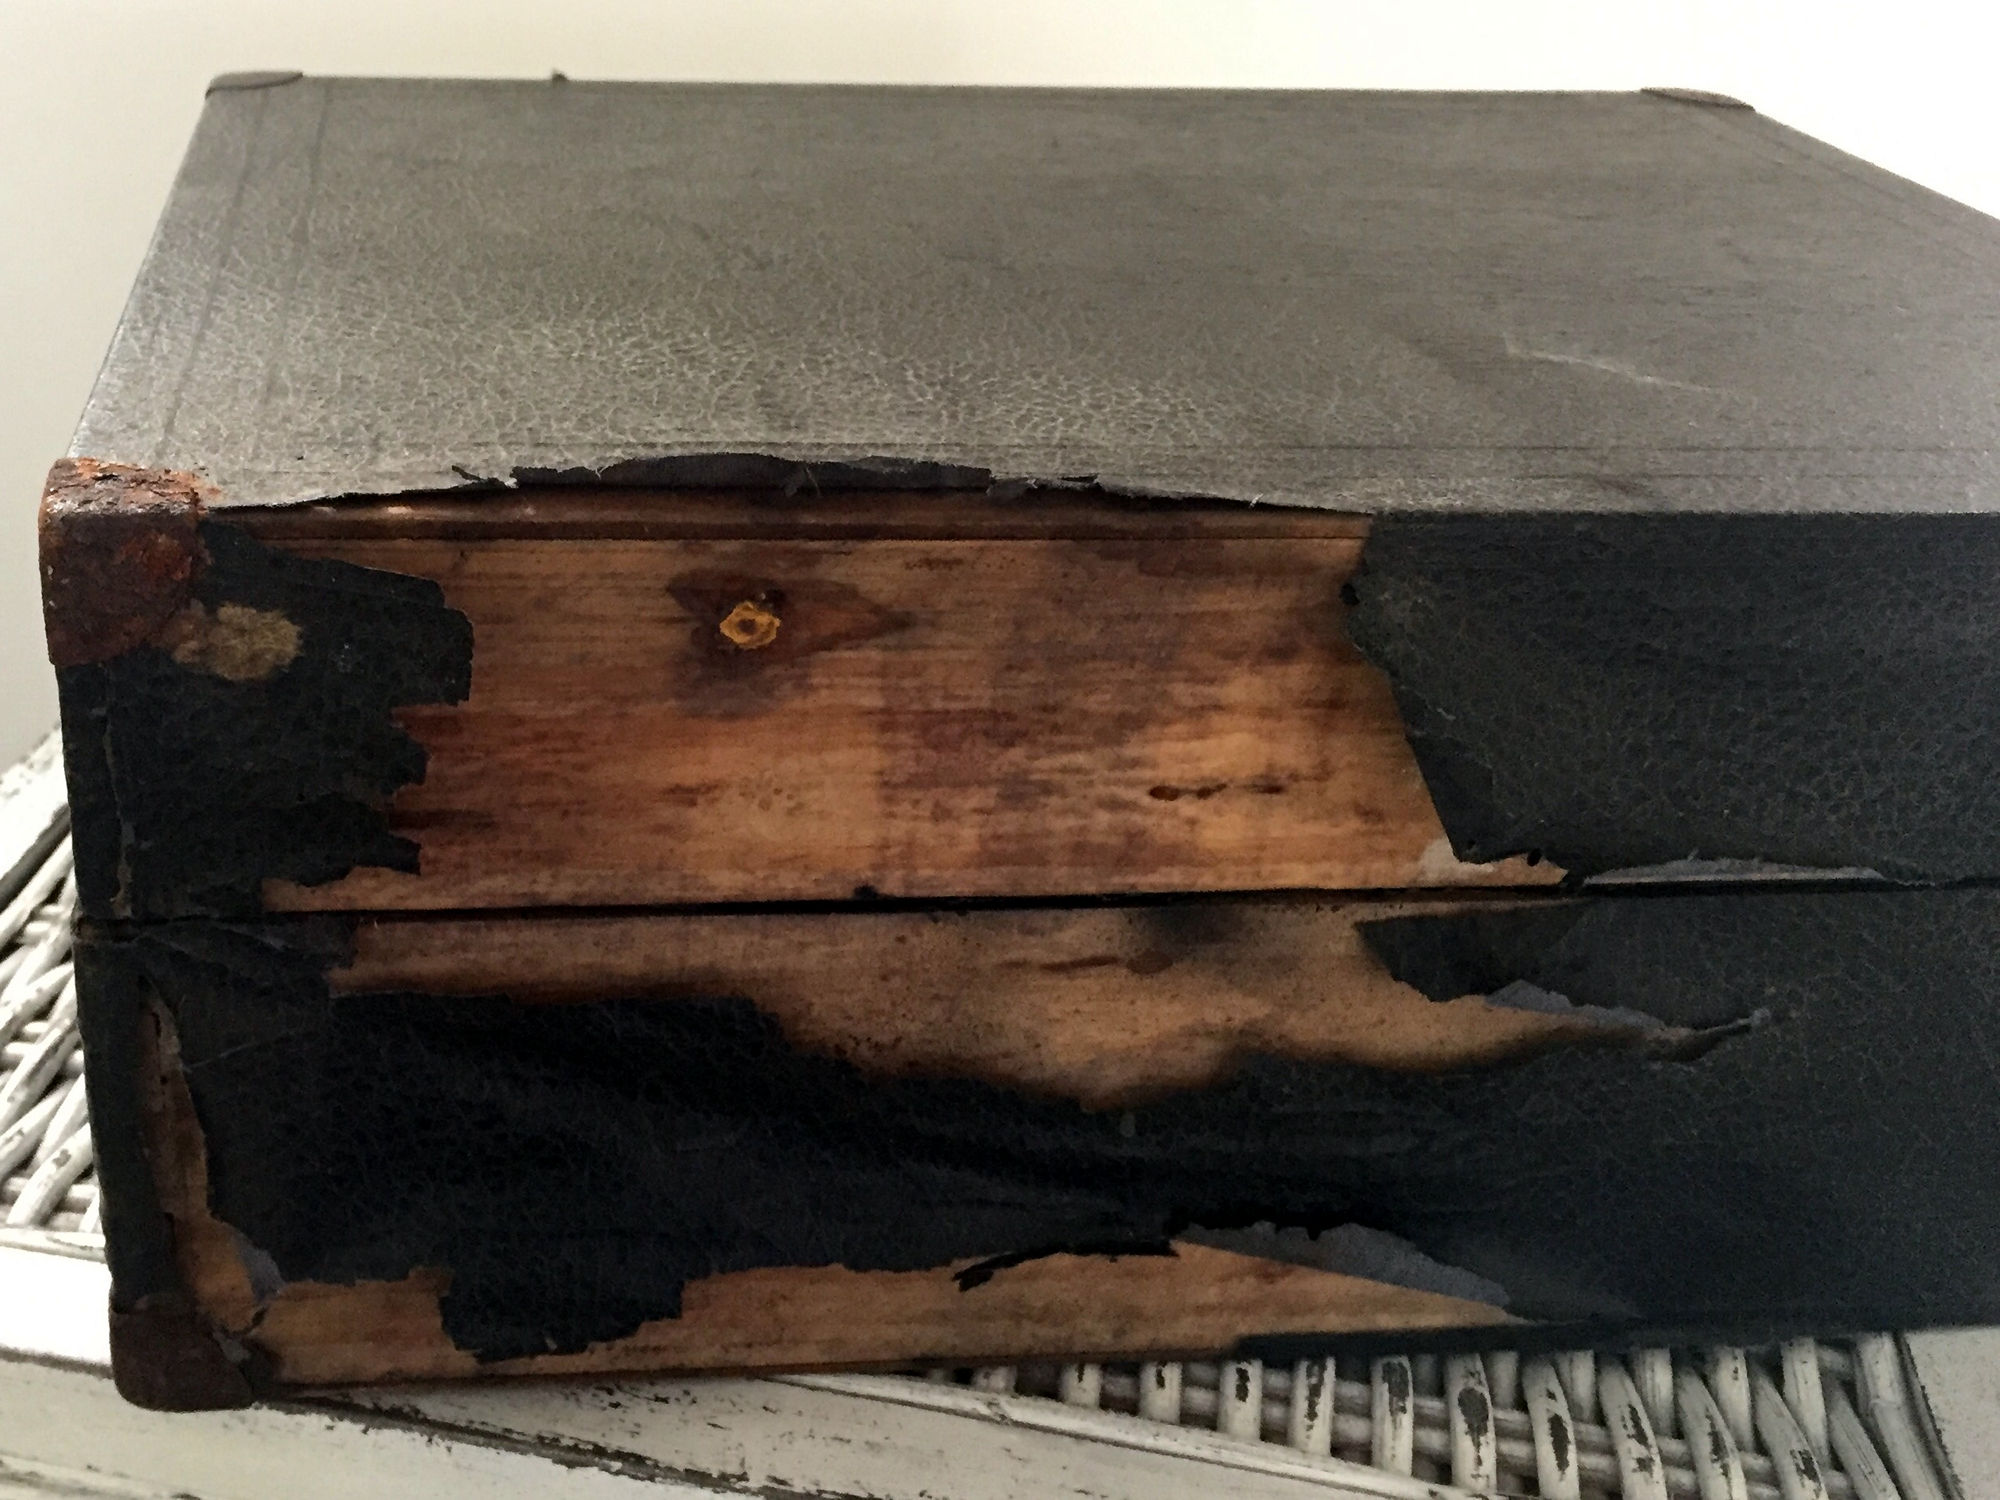
The covering was in very poor shape, so the plan was to completely restore it
with a new leatherette cover.
The pictures are purposely over sized so you can see the details. If you right-click
and "View Image" you can enlarge them further- most are 2000px wide
Before and after shots
Steel ruler, PVA glue (at least 250ml), brush, new sharp stanely knife, Rexine,
butchers paper, sand paper, re-sealable plastic bags
Replacement screws, hinges, corners, catches, rubber feet?
Take lots of pictures- especially of any hardware you remove
Take particular note of how the original Rexine was folded and cut on the corners
Don't let your Rexine supplier fold it for posting
Make templates of the location of existing screw holes- you can't see them when
its re-covered!
Put all screws in bags and Label them
Measure 3 times- cut once!
Try a practice run-through with paper first- cutting and folding
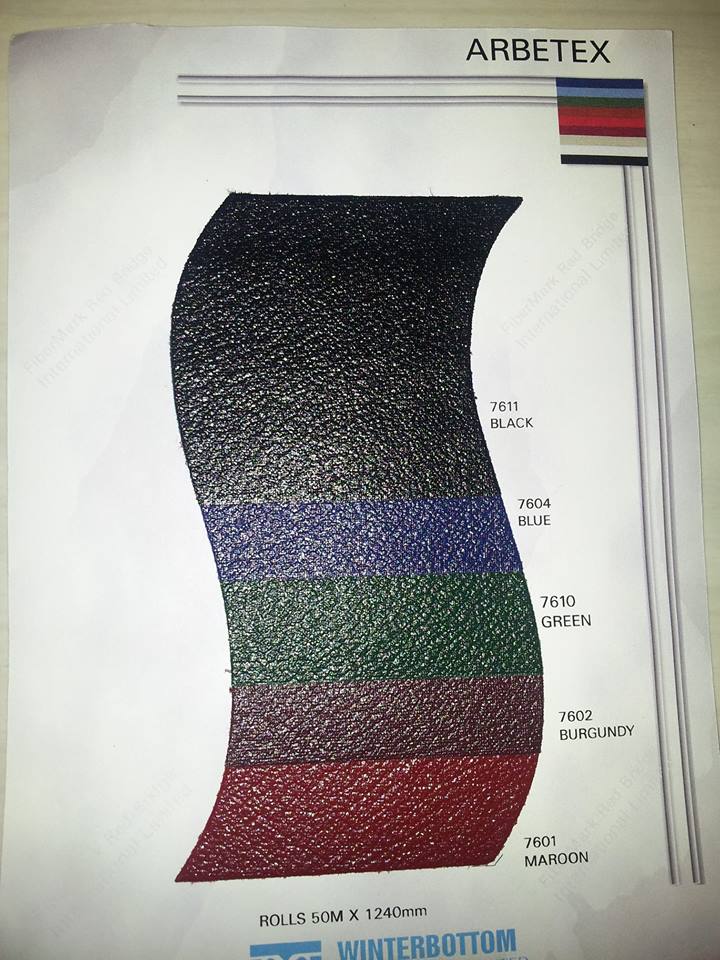
In its day it was known as Fabrikoid (USA), or Rexine (UK). Its the same stuff used for upholstery, and by bookbinders, and that is where you can buy it. In Australia the supplier is Winterbottoms at Seven Hills, where it is called Arbetex. At the time of writing (2018) it was $16 per metre, and the roll is 1240mm wide. I bought a metre and it wasn't enough- that's why its a two-tone unit now. I would suggest at least 1.5 mtrs (if you don't make any mistakes). Arbetex comes in black, green, blue, burgundy, and red. Important tip: Pay the extra postage to have it rolled and sent in a postal cylinder- the fold marks are very hard to get out! Your postage will cost as much as the arbetex- allow $50 total
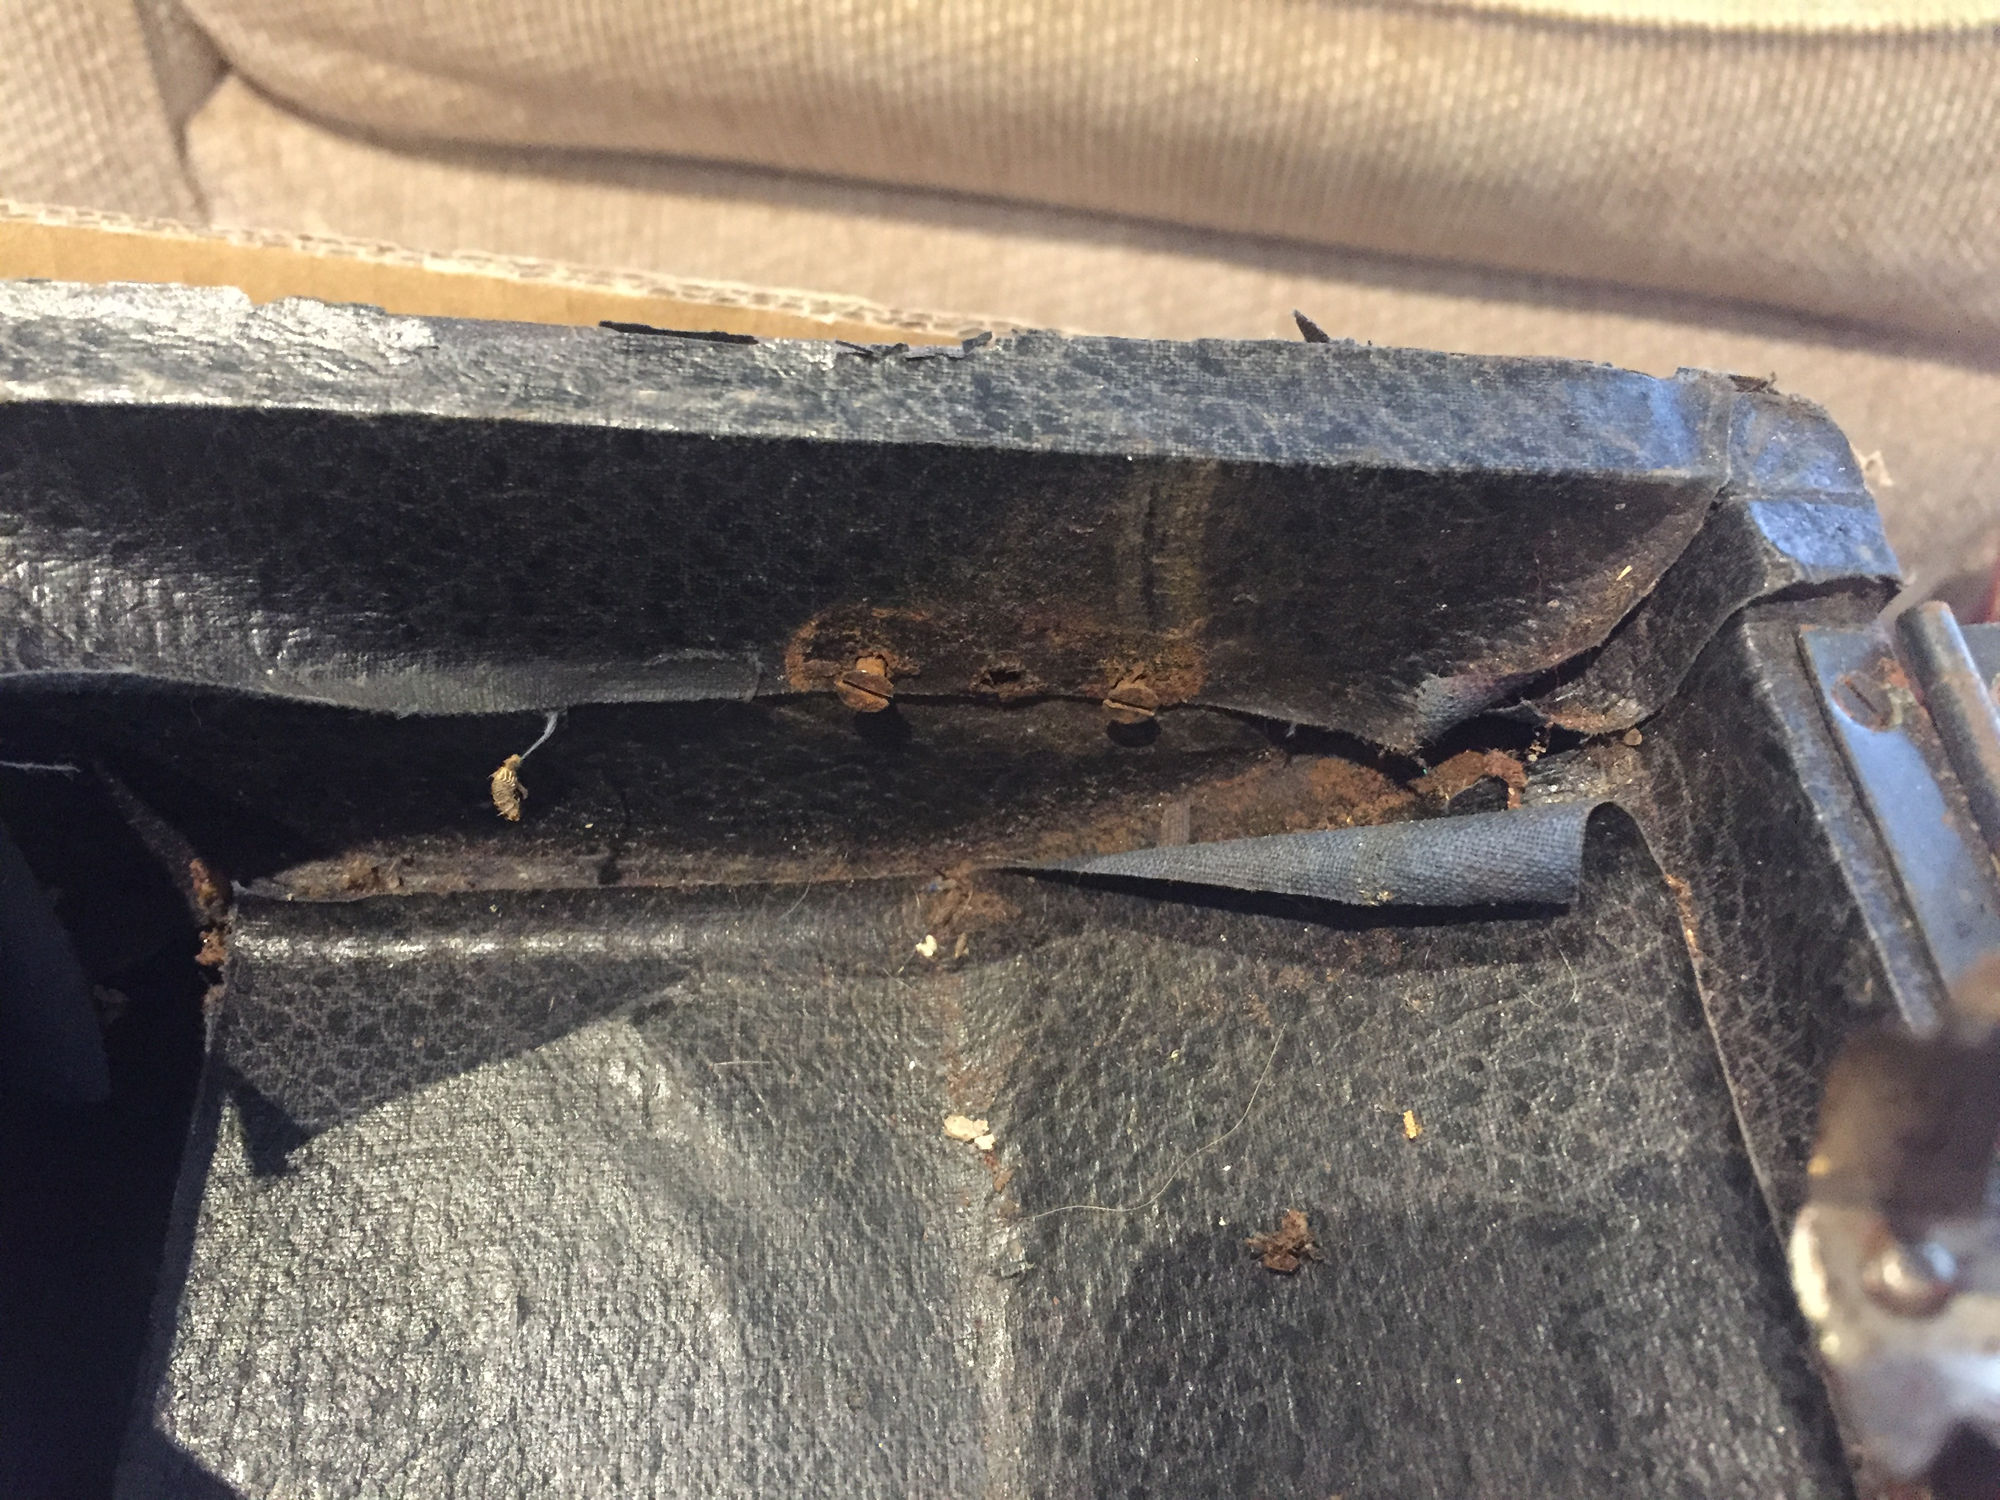
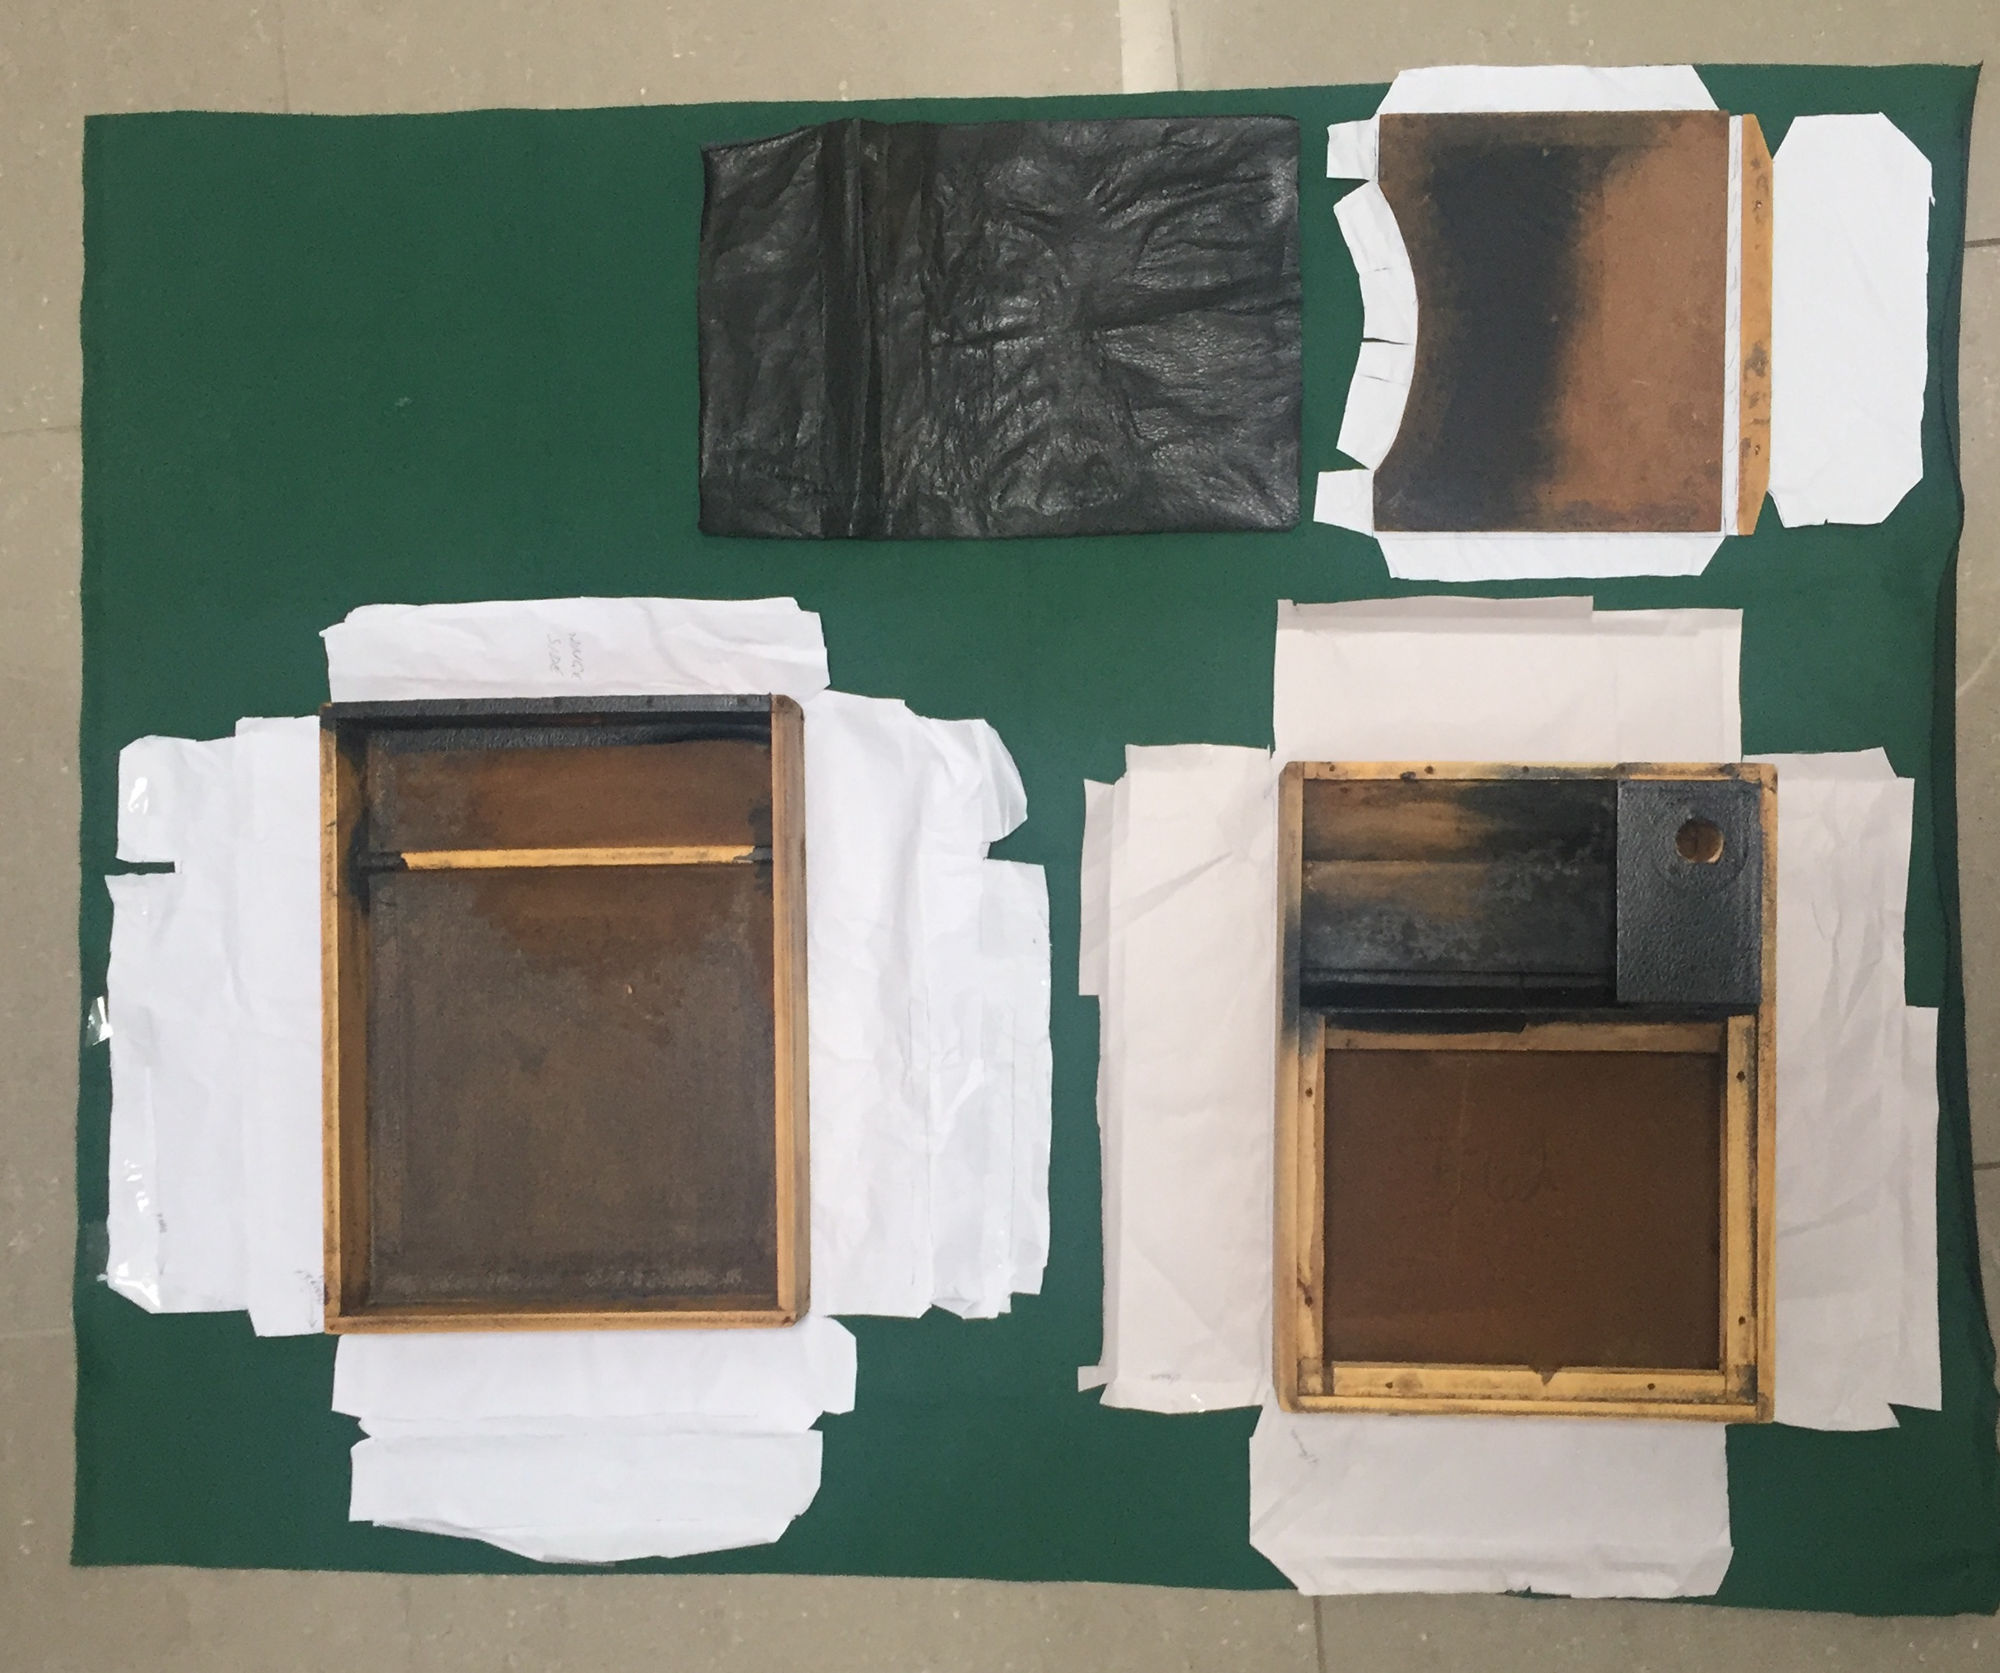
You will need to remove all the hardware off your machine- hinges, handles,
catches, needle holder, escutcheon, turntable, tone arm, corner brackets.
The old slotted screws are very hard to come by, so be very careful removing
and packing them. Use the correct sized screwdriver. They are probably rusted
into the wood case. Firm, but very slow movement, will see most of them come
out. Use paper to make templates of the location of existing screw holes- you
can't see the holes once its re-covered!
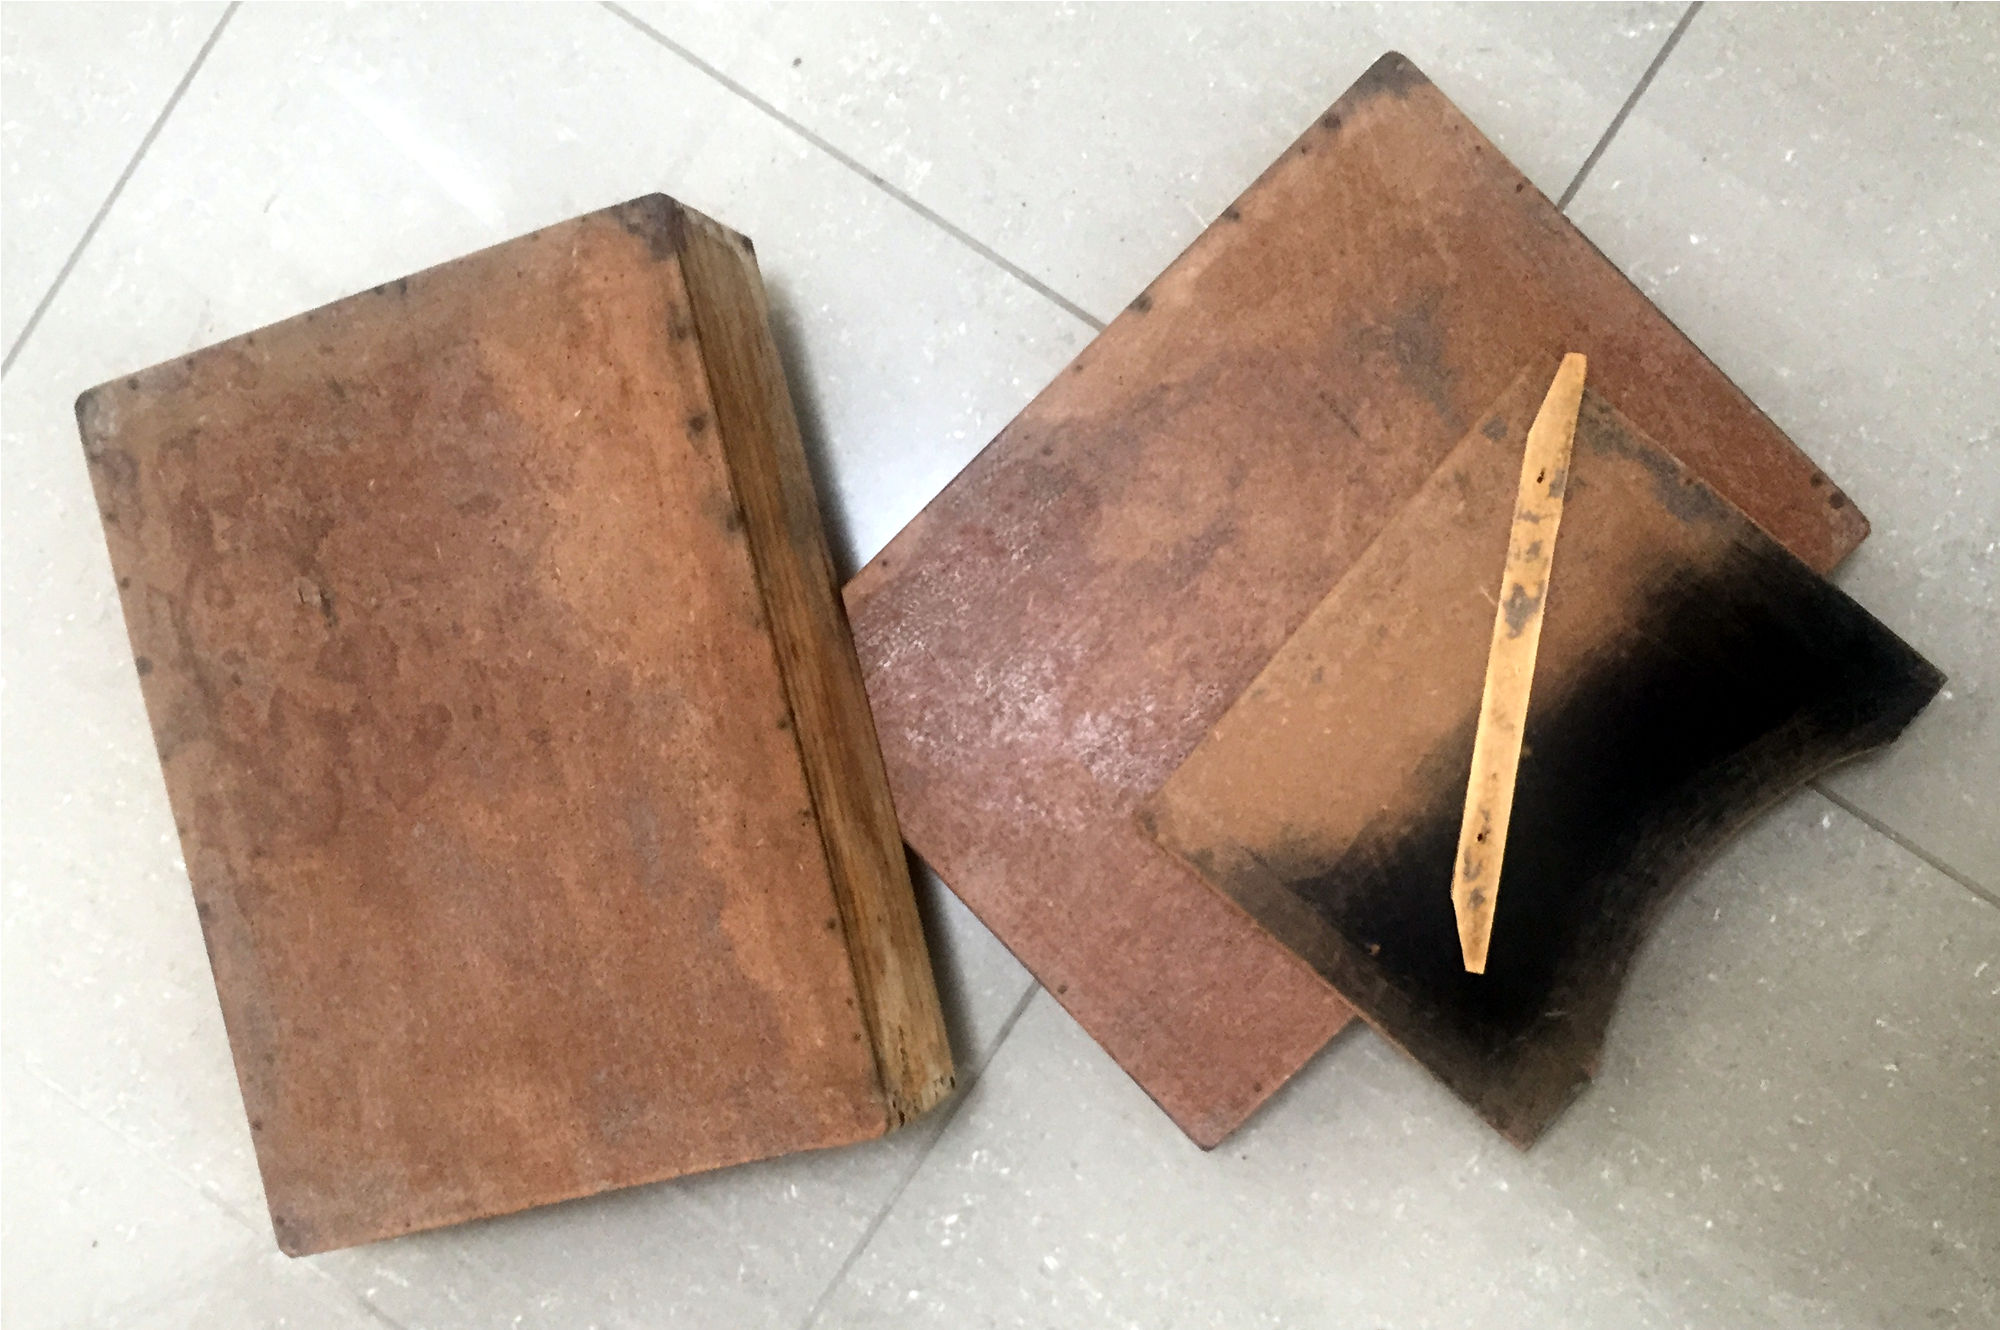
Tear off the existing Rexine. As you do, pay attention to how they cut and folded the corners. Take pictures and make notes. If possible keep each removed piece in a single complete unit, it may be useful as a template. I've read that wetting the Rexine will loosen the glue and make it easier to pull off- I didn't need to, I think the unit was already water damaged
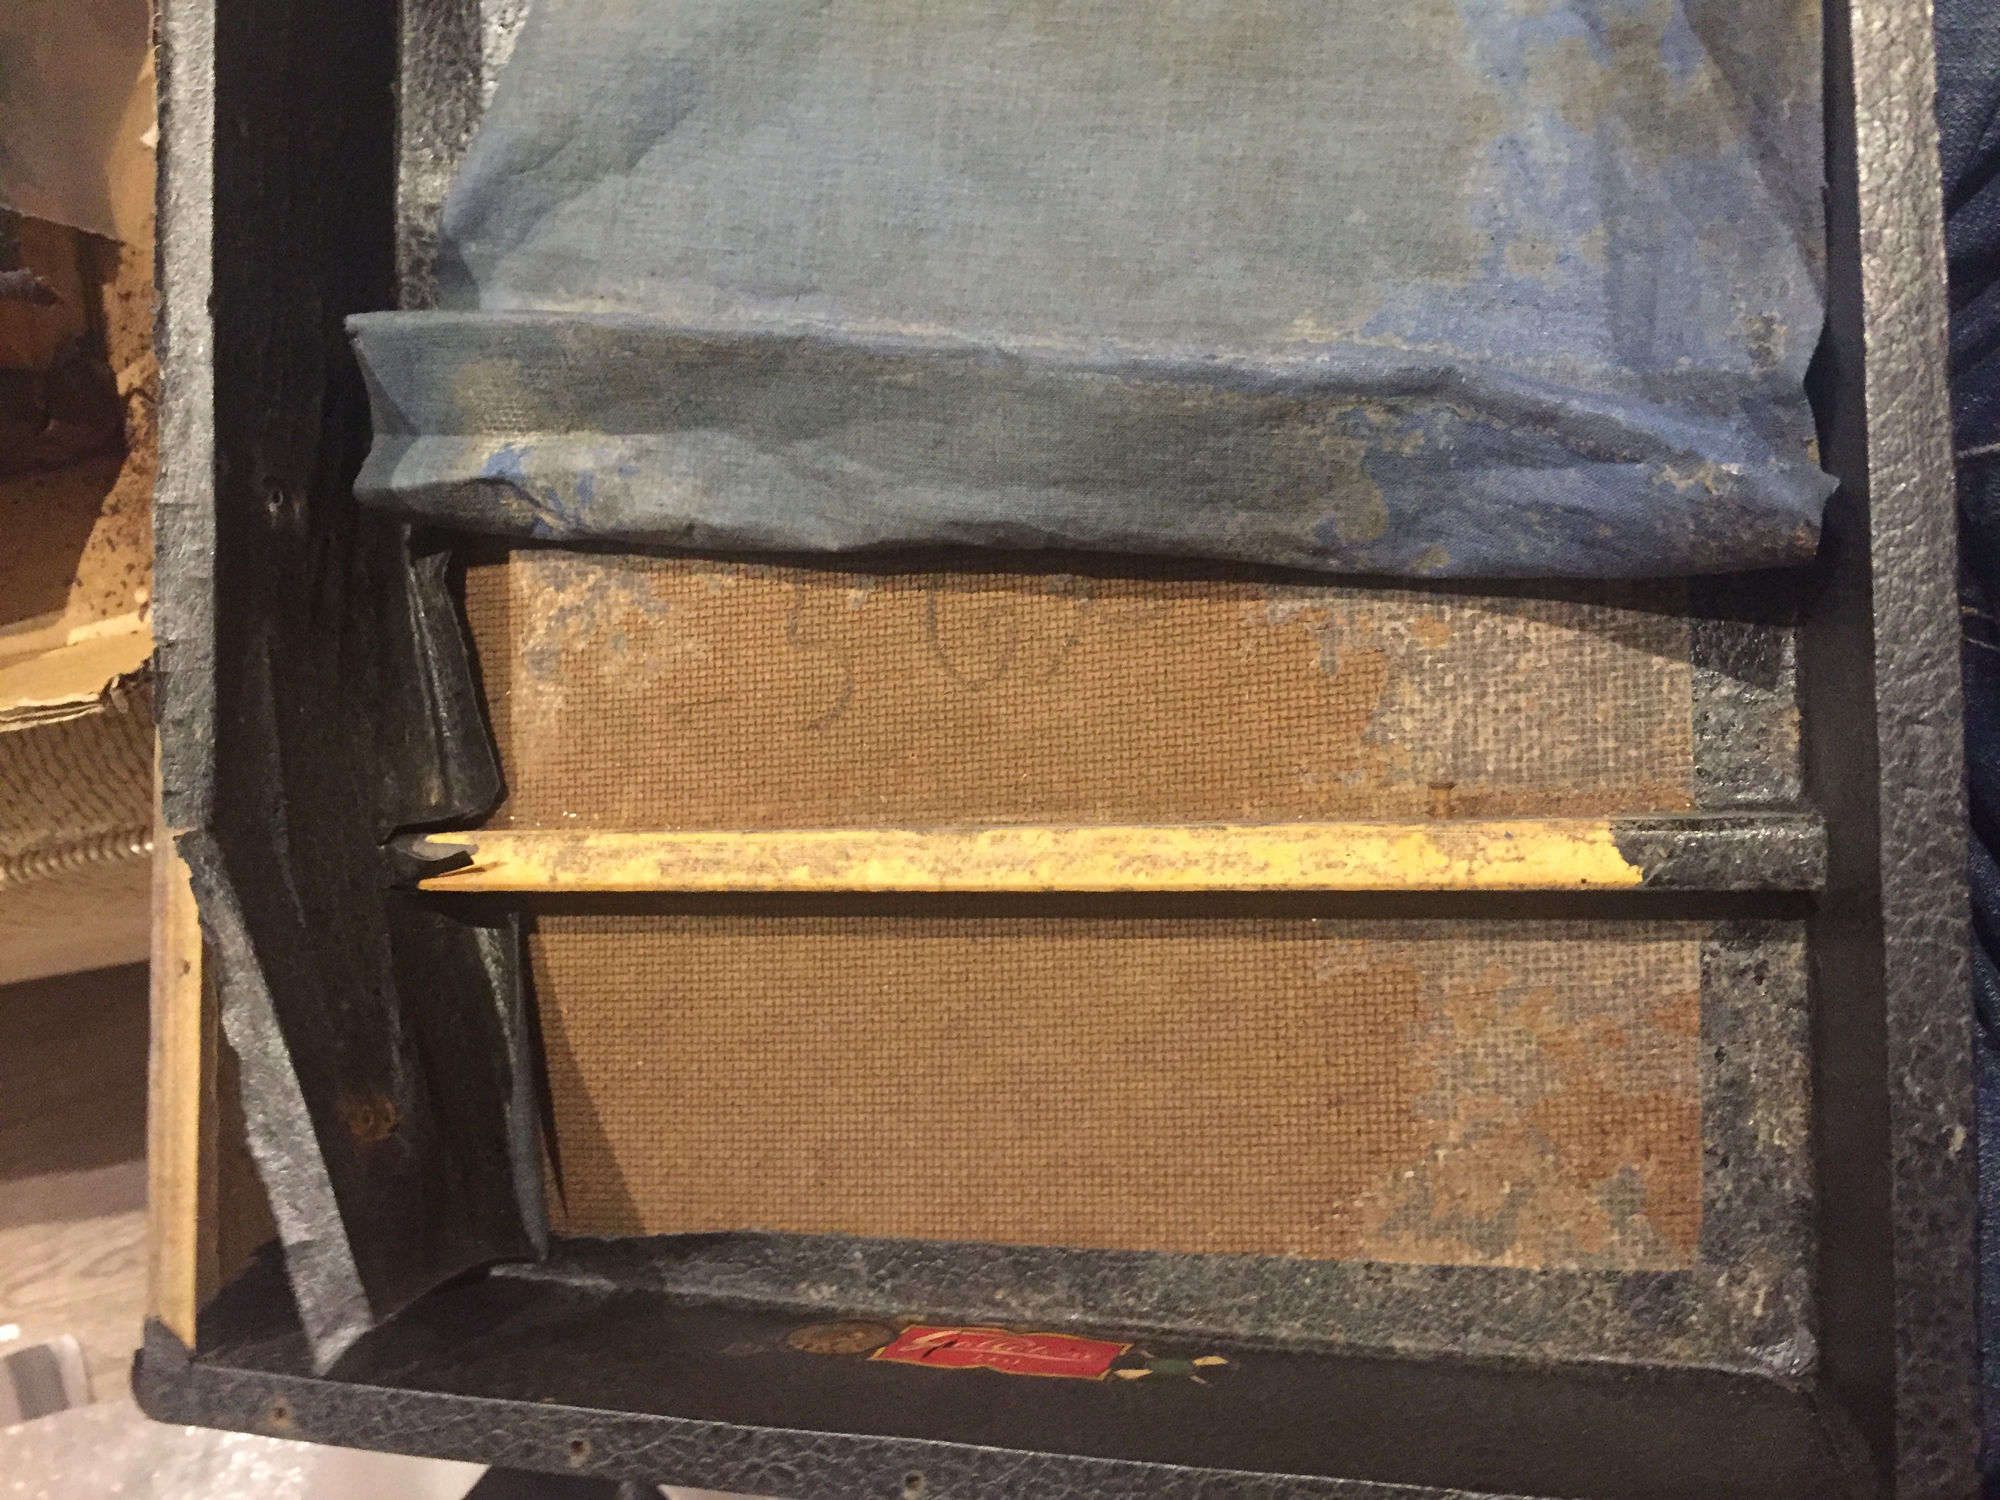
Sand and/or wash off the existing glue. Any dents or raised bits need to be removed/filled (not the screw holes)- they will show up when its re-covered.
The timber is usually very old and dry, so I found it was useful to paint all of it with PVA mixed with a little water, this created a good seal, and ensured an even coverage when the glue was used later to apply the Rexine.
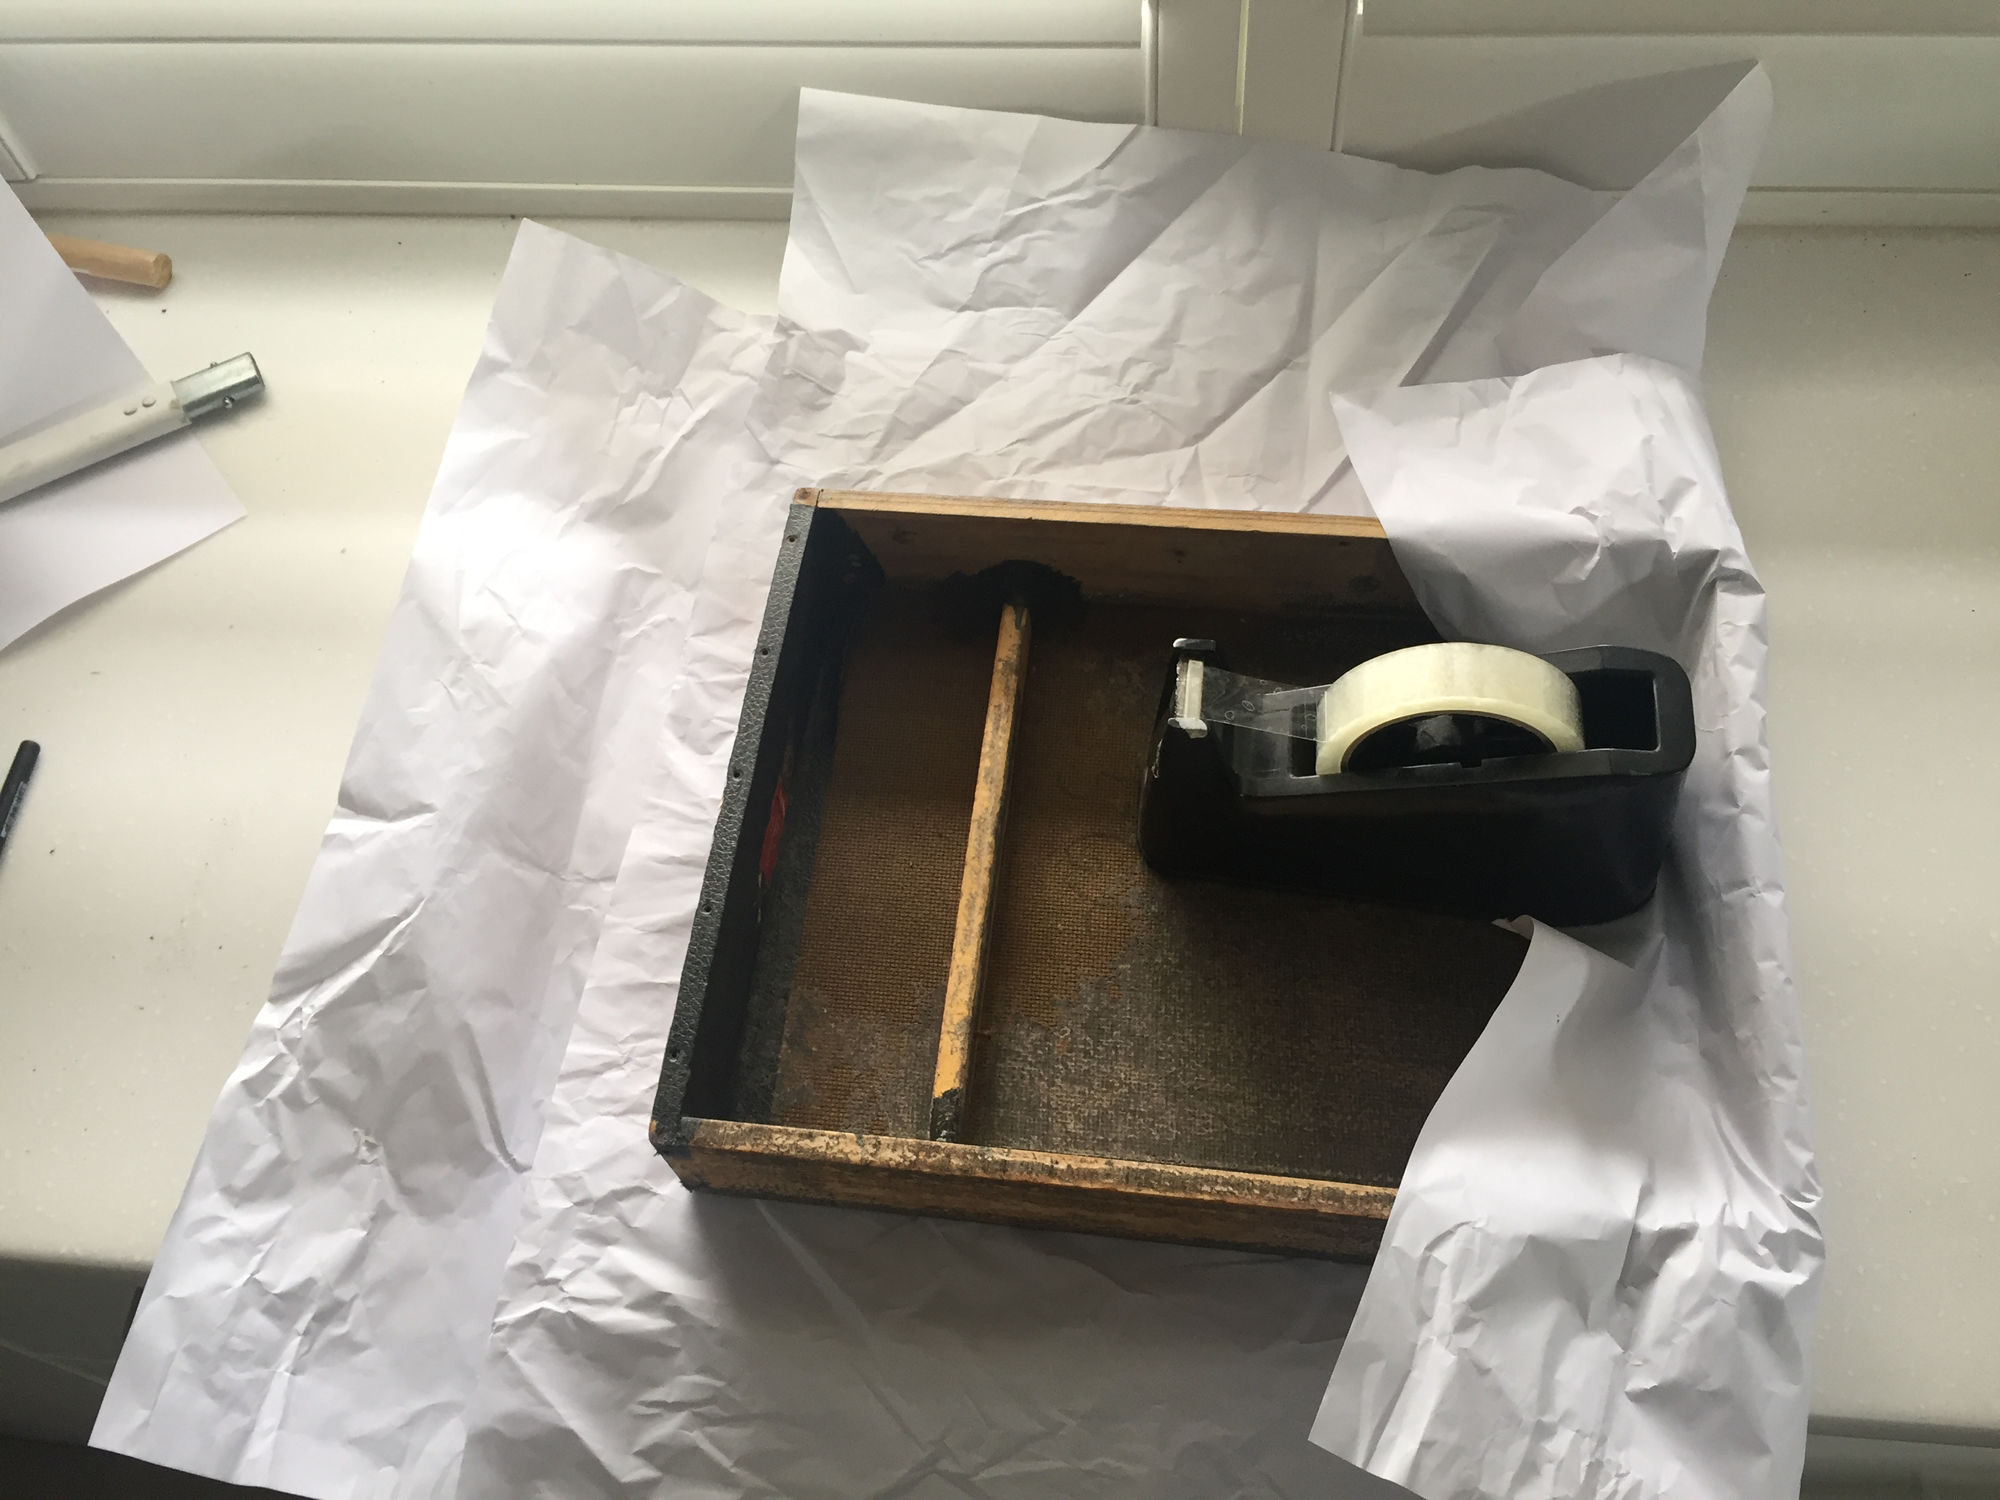
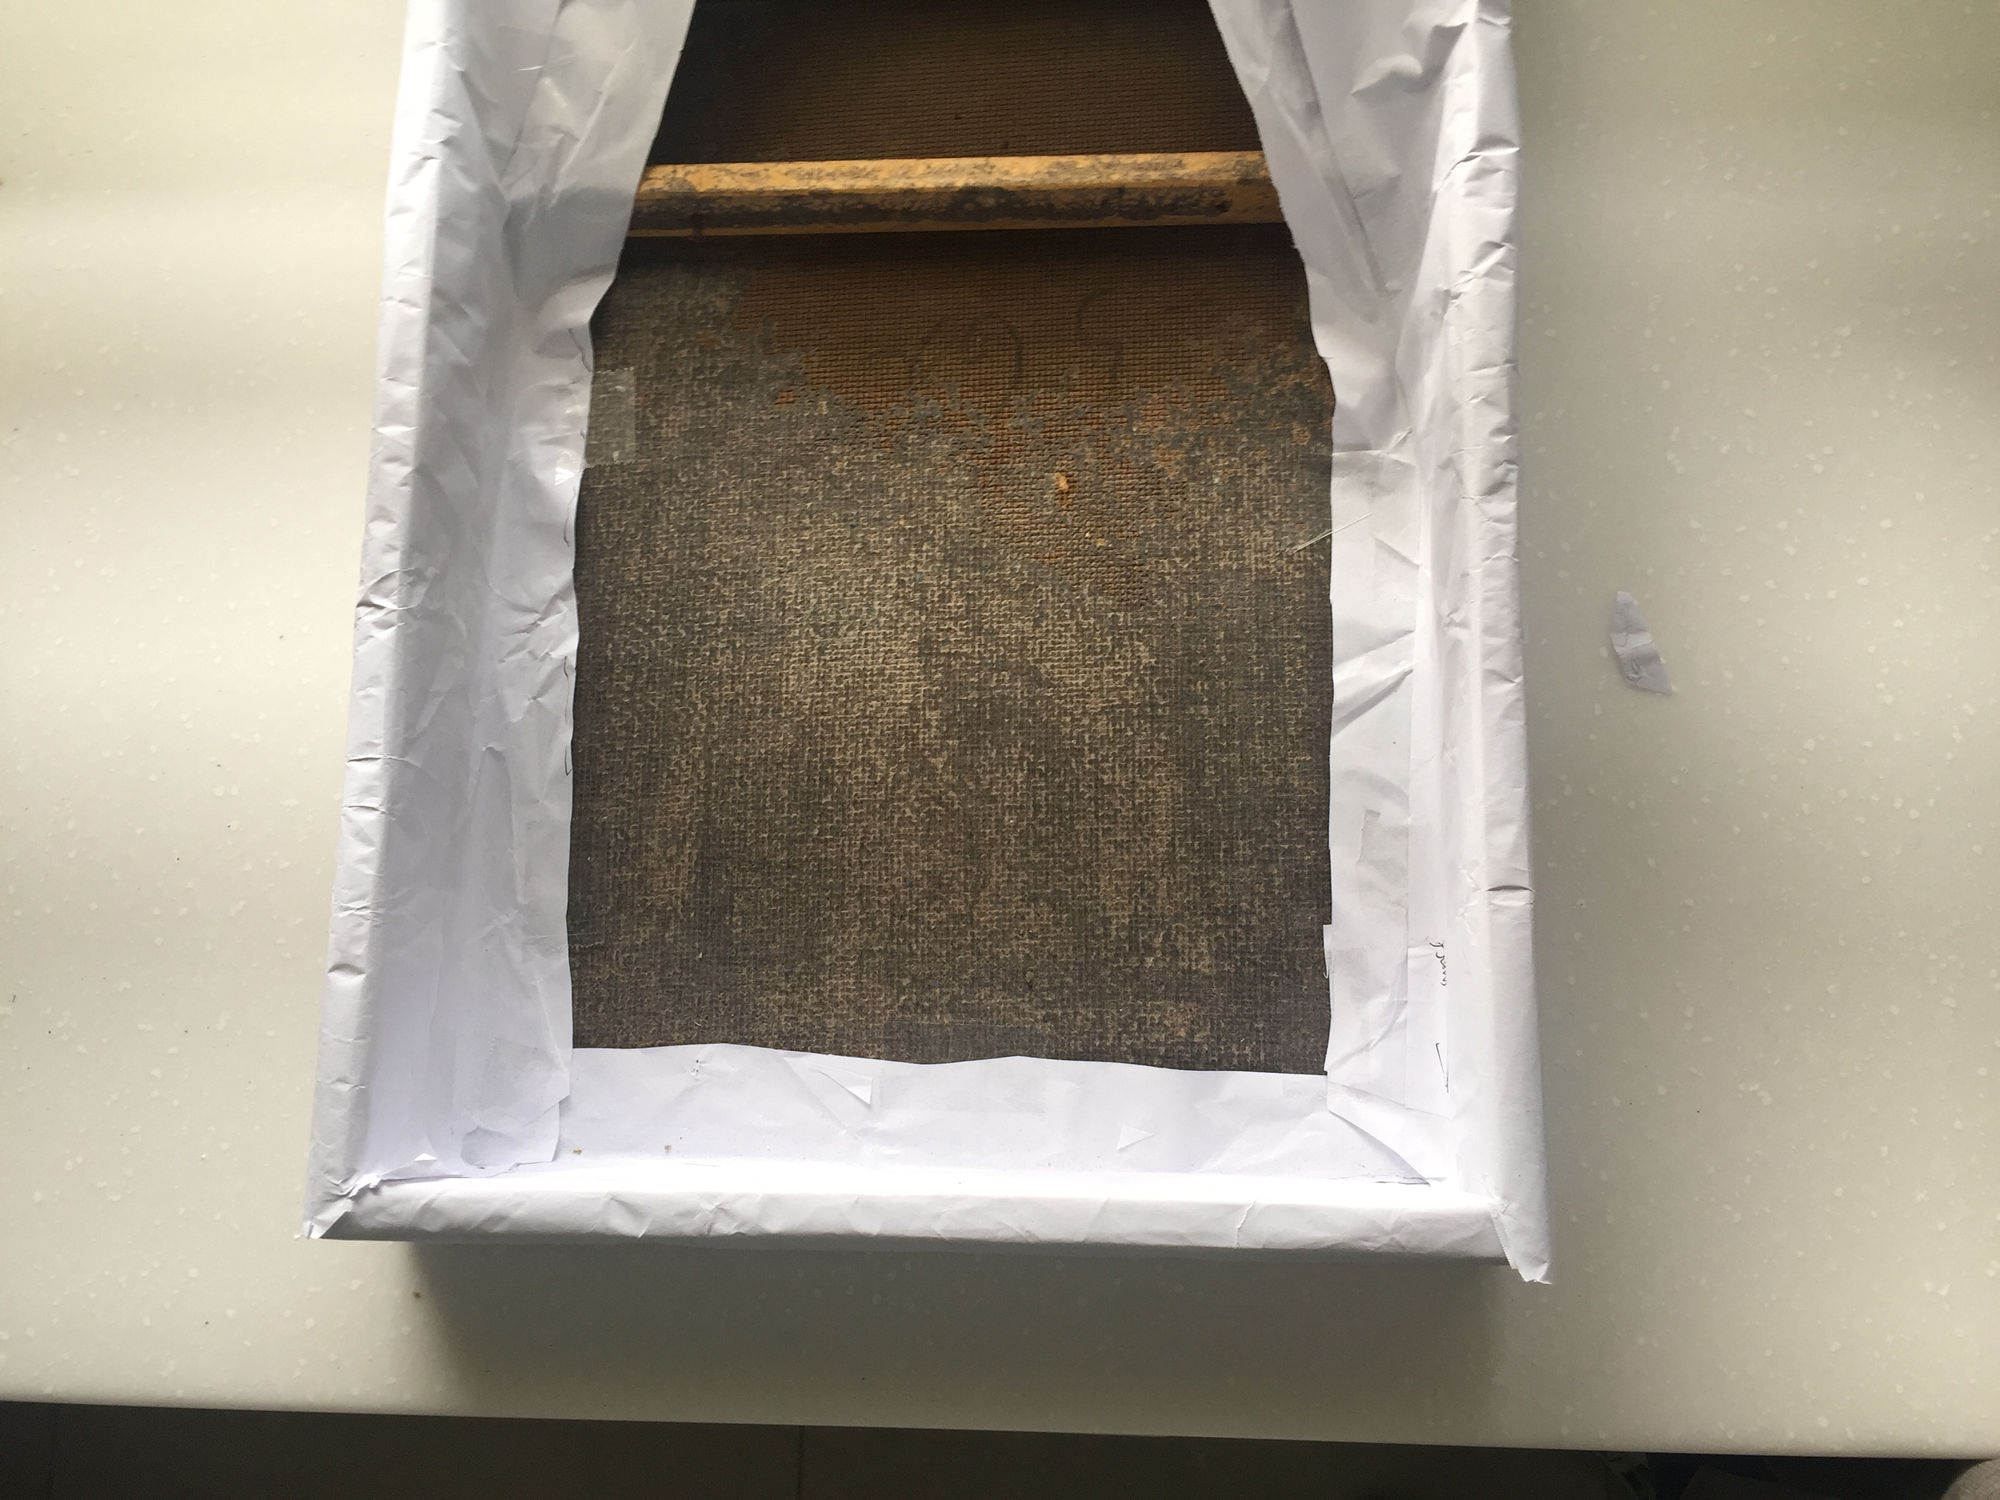
This may not be necessary, but I found it helped me get confidence, and to learn how the folds and cuts would be done. It also made it easy to see what would need to be cut out of the sheet of Rexine, and how to get the least waste. I used large sheets of butchers paper, joined with sticky tape if they weren't big enough. I wrapped the boxes as if I as using the Rexine, cut it folded it, and used sticky tape to hold it in place while I did the next fold and cut. I also tried to emulate the cuts and folds at the corners. These were the tricky bits. if you don't get these right, the rest of your work will be wasted.
Using your paper template, mark out on the cloth side of the Rexine, where the base of your box will go. Use large arrows to mark the corners, so they are easy to find after the glue is applied.
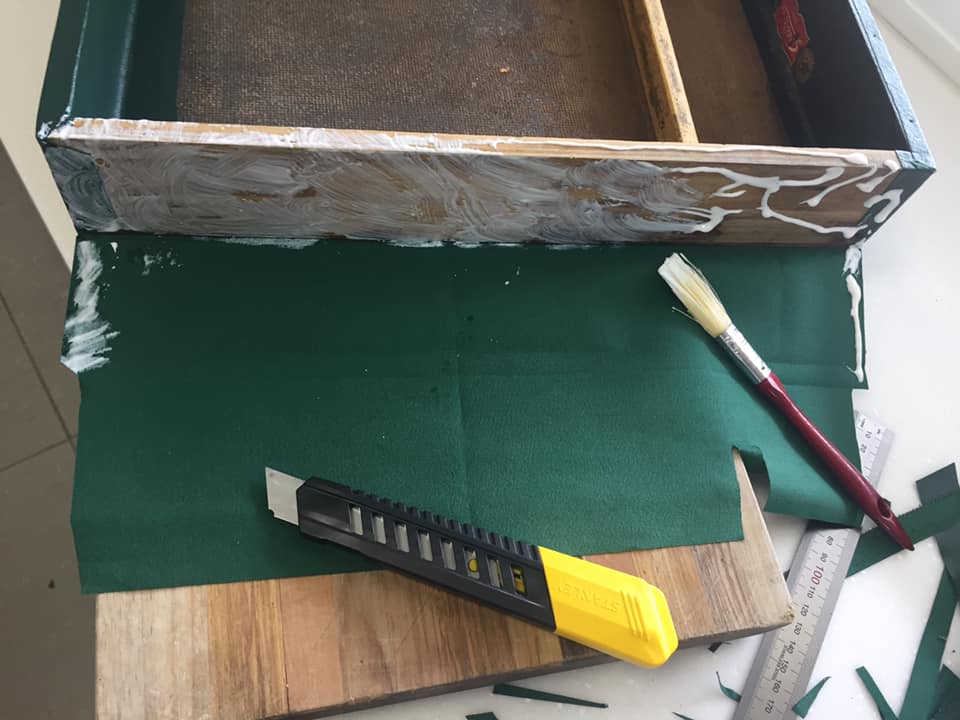
Squeeze the glue onto the surface of the box, and then brush it into an even
film. You want enough so every part of the surface is wet, you will get bubbling
if you put too much, and looseness if you don't put enough! Aim for say a 1mm
film. I found that brushing some onto the Rexine helped as well. The placement
of the box base is crucial. its also a large surface that you want to get smooth
finish on. I placed mine on a large tile, then weighted it down with encyclopedias.
Ensure the Rexine is clear of grit before placing the box on it!
After about 30 mins I carefully turned it over and checked there were no bubbles.
its still possible to smooth them out at this stage.
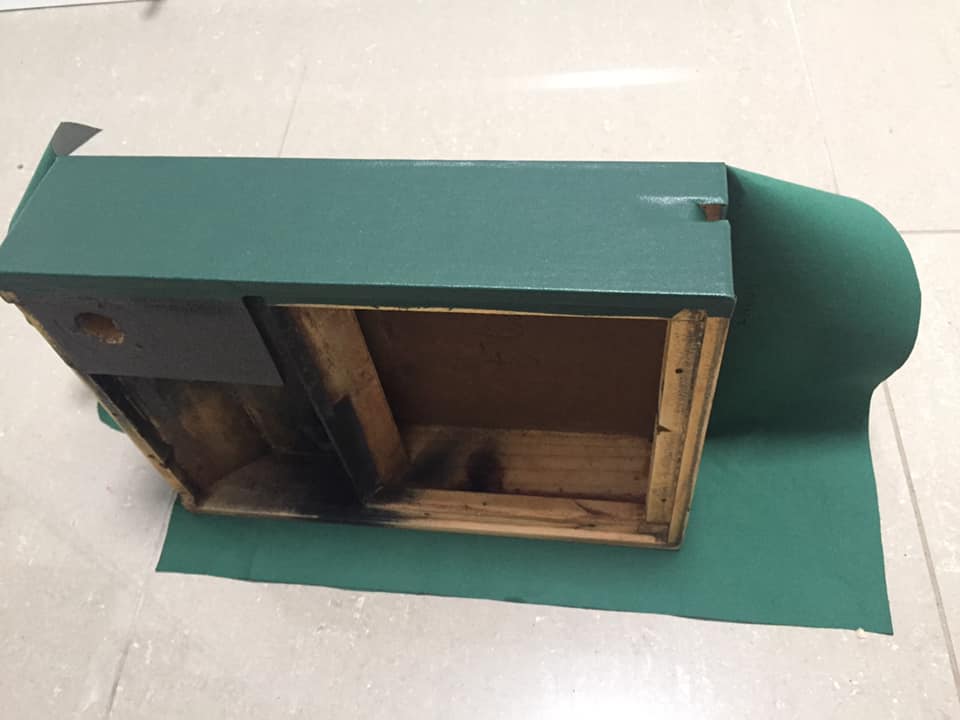
Once the main part is dry (leave for a few hours), you can start folding up the sides. Two of the parallel sides will fold over into the other eg on my case the front and back sides folded around by 1 cm into the left and right sides. So the left and right cuts are flush with the edges. Mark and cut as you go, if you pre-cut it will get out of alignment. I found that provided I put enough glue on the box 9and the Rexine) I didn't need to weight down the sides. Just stretch and smooth them into the next side. You do the sides that fold around first. Finish them all the way to the inside of the box. For the side that has to cut flush with the edge (left and right sides for me), Ifound the best way was to lay the Rexine flat on the bench, line up the steel ruler with the side, and cut.
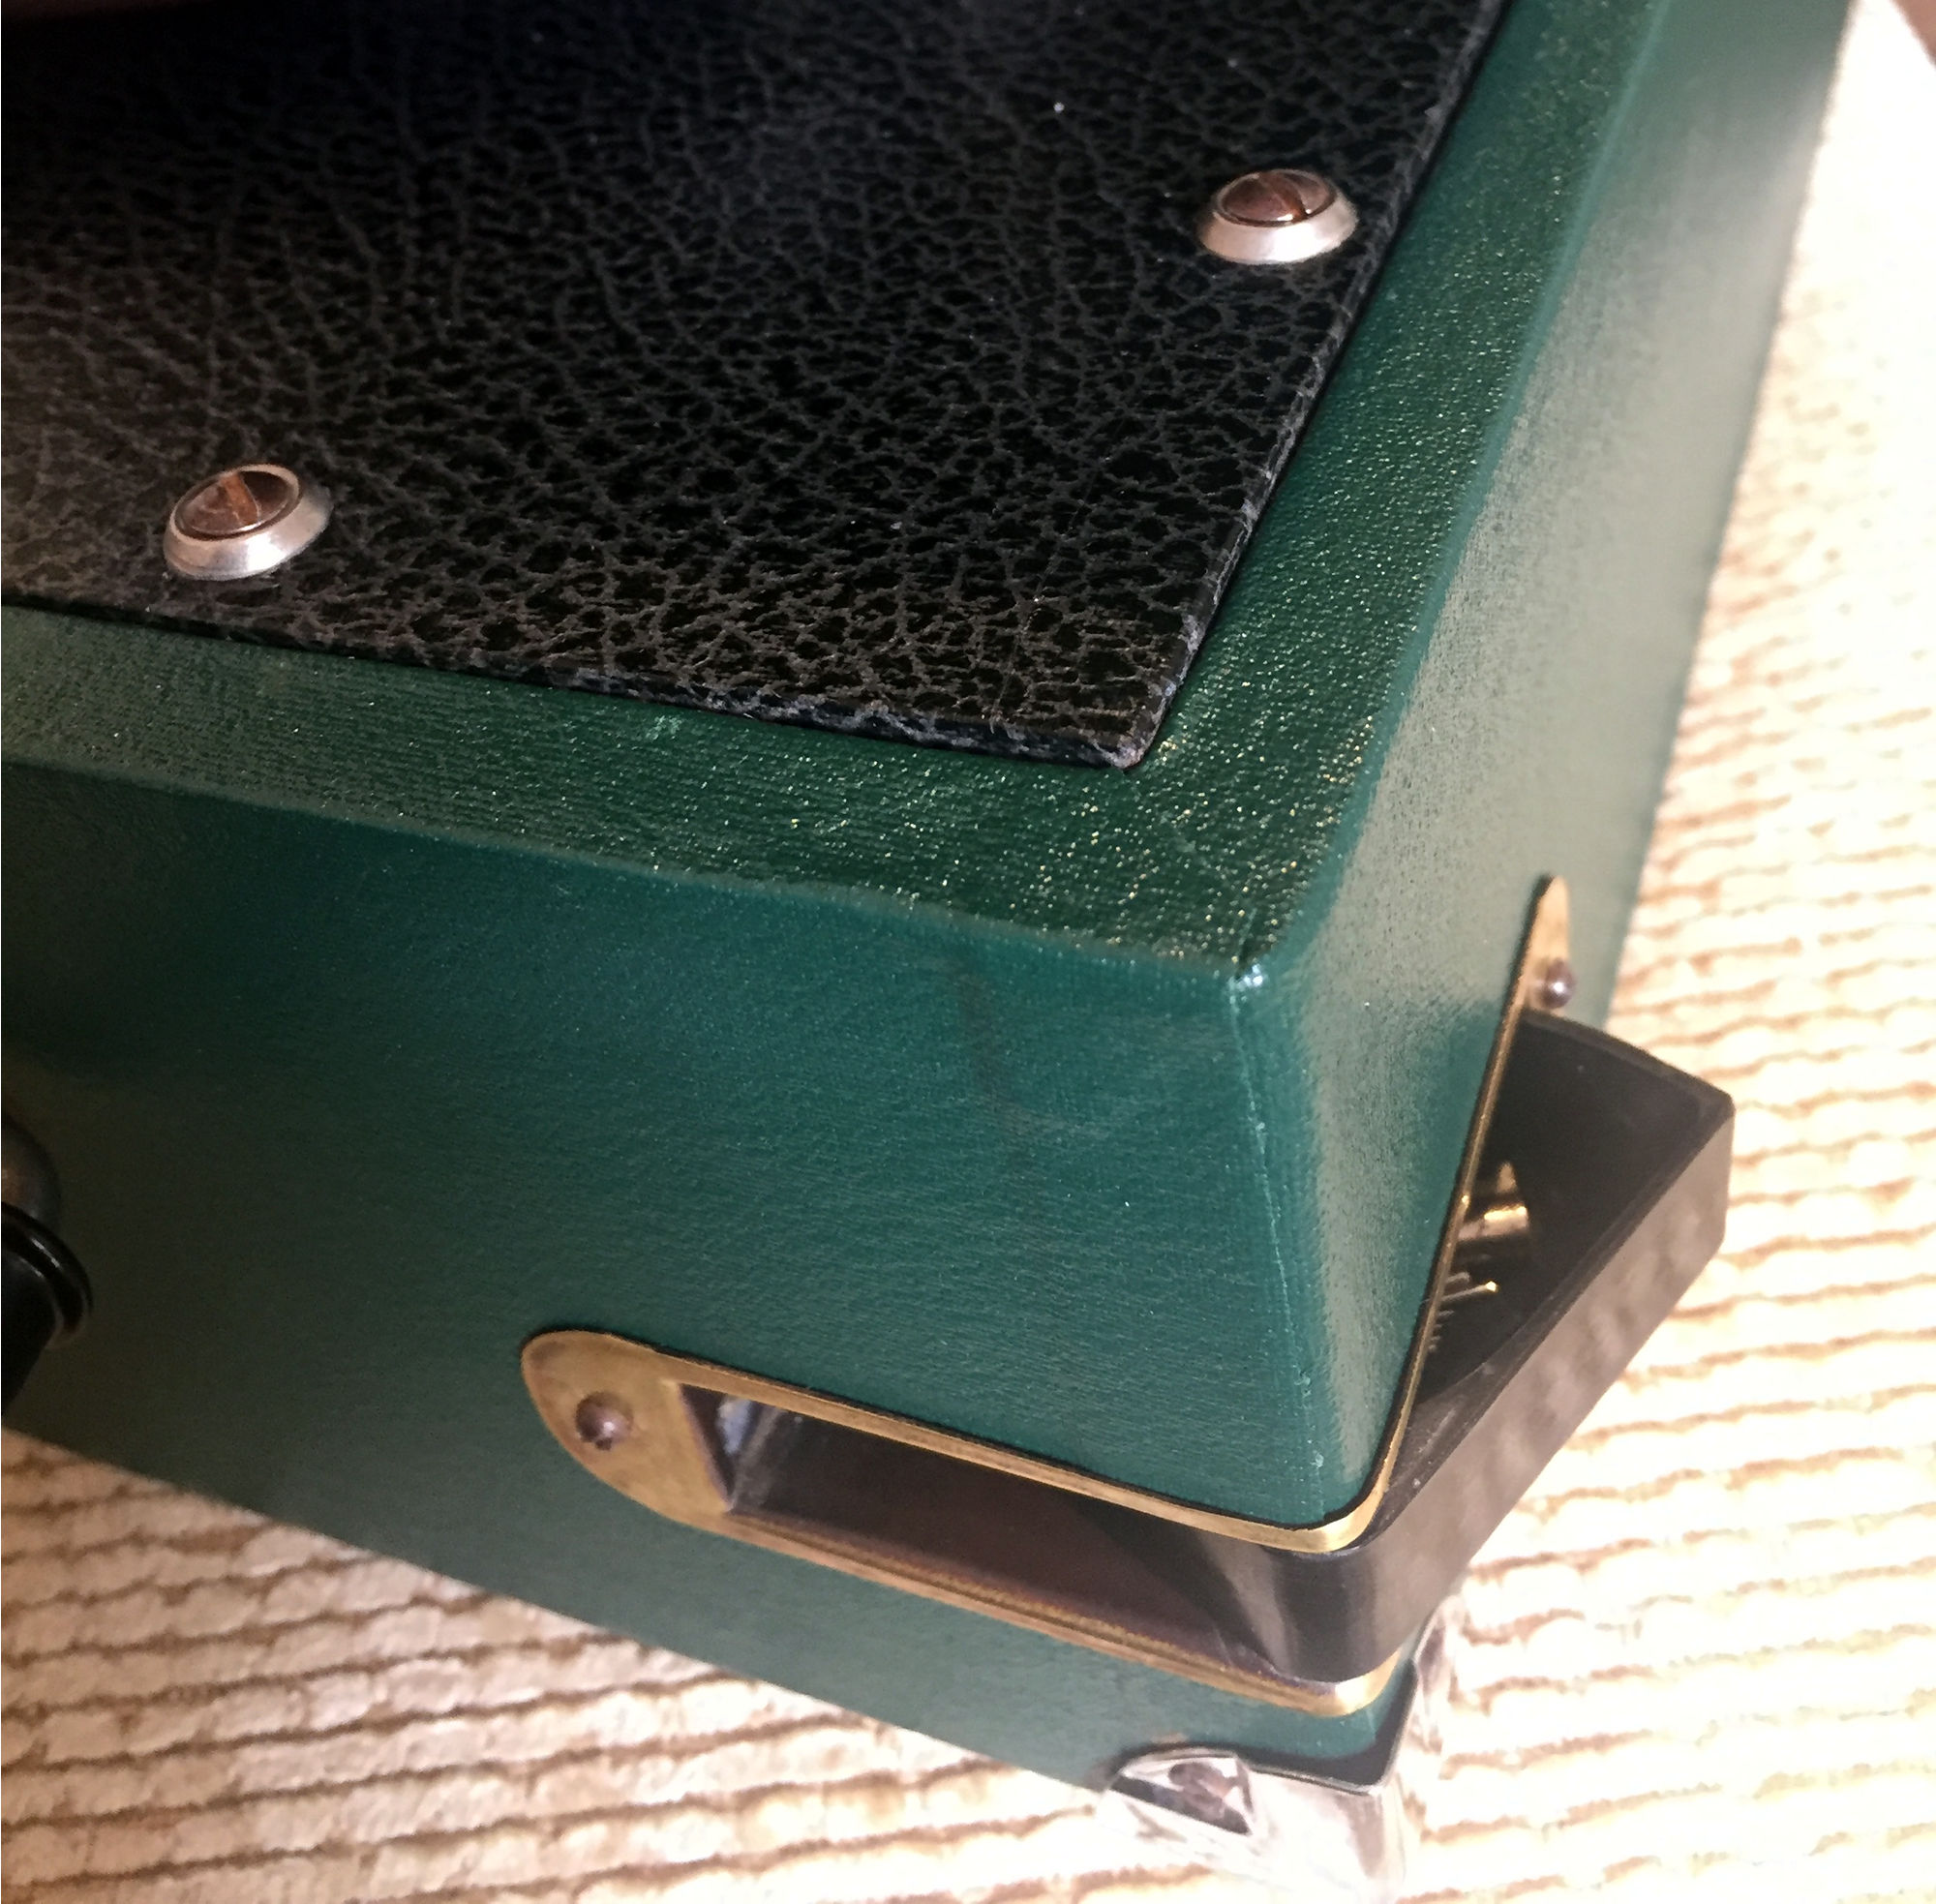
My corners and locks were pretty bad, so I opted to buy shiny new ones on eBay.
I also bought rubber feet on eBay. They were remarkably cheap. I used these
eBay sellers: costcocity003 (toggle latch), avarsia (foot pads, corners)
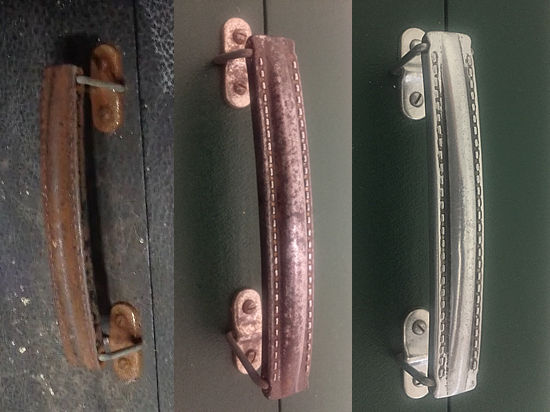
The handle was all metal to I roughly polished off the rust (while it was unscrewed
from the case) and applied Rub'n Buff silver leaf.
This is a Gallotone 220 portable. I can find almost nothing about it online. I've restored it, just for the practice, it was originally black. I know it comes from South Africa. It has a Garrard no 20 motor ref no 152, made in England. The tone arm base and the case handle both have "Made in England" stamped on them. The soundbox has no markings. The box lid is masonite. Masonite production in Sth Africa started in 1942, so presumably its no earlier than that. (an aside: Masonite was patented in 1924 by William H. Mason, who was a friend and protégé of Thomas Edison!). Gallo was a major player in the Sth African music industry. Since electricity was slow to be available, gramophones persisted much longer in SA. Still made in 1960s? That's all I've been able to find out..
Copyright: John Carmichael 2019 Australia
I found these two videos on YouTube helpful:
Recovering A Dansette Major Deluxe Rexine Or Vinylcloth
https://www.youtube.com/watch?v=7OQWr3eNhwQ
https://www.youtube.com/watch?v=W-CiucTNMZA